Category: Hardware
AV-Sync troubleshooting NL
Connecting the basic hardware
As soon as you have received your new hardware you can start setting it all up. In this specsheet you can see how the basic setup should be connected
Interactive IDentifier manual
previously known as Collecting IDentifier
General
What can you do with the Interactive IDentifier?
The Interactive IDentifier makes it possible to send data from the Podcatcher to an interactive application developed by a third party. Software must be installed on a Windows computer which the application can use to communicate with one or more connected Interactive IDentifiers.
The selected data contains information about the tour, such as a unique tour ID, a unique visitor ID (as in a number, not a person) and the language of the tour. The third party can use this data in an interactive application to identify a visit and/or offer a customized personal experience. For instance, to guide the visitor through an exhibition or to make a connection between multiple interactive applications.
Another example of data which can be tracked could be; responses given by a visitor when questions need to be answered using the A/B/C buttons on the Podcatcher (for instance with a survey). Or tracked data of the usage of layers within an audio stop.
In both cases you add variables and values to the audio clips which can be extracted using the Interactive IDentifier.
Package contents
Interactive IDentifier
This is the point of activation used for visitors to aim the Podcatcher at.
USB cable
The USB cable connects the Interactive IDentifier to the PC on which the interactive application is running.
Installation prerequisites
A PC running Windows 7, 8 or 10.
.NET framework 4 has to be installed.
A free USB port (2.0 or higher)
TourEditor content
If you only want to use the Interactive IDentifier to extract the data from the Podcatcher you do not have to make a stop in the TourEditor.
If you would like to play an audio file on the Podcatchers, after triggering the Interactive IDentifier (for instance; “please follow the instructions on the screen“) you can. You do this by adding a stop in your tour, upload the audio file and add the IDentifier code (trigger) C001. (all Interactive IDentifiers are set to send out code C001 to the Podcatcher).
If you are using multiple Interactive IDentifiers, and you would like a different audio to play at the various points, you make multiple stops in the tour and add a different code to each one of them. For instance C002 / C003 / C004 etc. But beware this also means you need to reprogram the Interactive IDentifier itself to send out the corresponding code.
Reprogramming information will follow soon
Configuration in the TourEditor when adding an audio file to an interactive application
This part of the installation requires access to the Podcatcher Portal.
- Log in to the Podcatcher Portal, click on the TourEditor icon, and choose the Tour you’d like to add the Interactive IDentifier to.
- Make a new Stop (or choose an existing one)
- Go to the Stop’s Clips.
- Edit the first Clip, and upload the audio as appropriate for each language.
- Configure the Stop trigger by adding the Interactive IDentifier code C001 to the Stop. (The IDentifier is standard set to send out code C001 but you can range from C0:01 to C0:7F. You can choose a code and reprogram the Interactive IDentifier.)
- Publish the Tour and start a Sync so the Podcatchers will download the content.
Adding variables and values
- If you want to make use of adding variables and values to track data go to the Stop’s clips and select the clips a visitor can select
- Go to the tab “Advanced” and enter a variable and value at the interactive part.
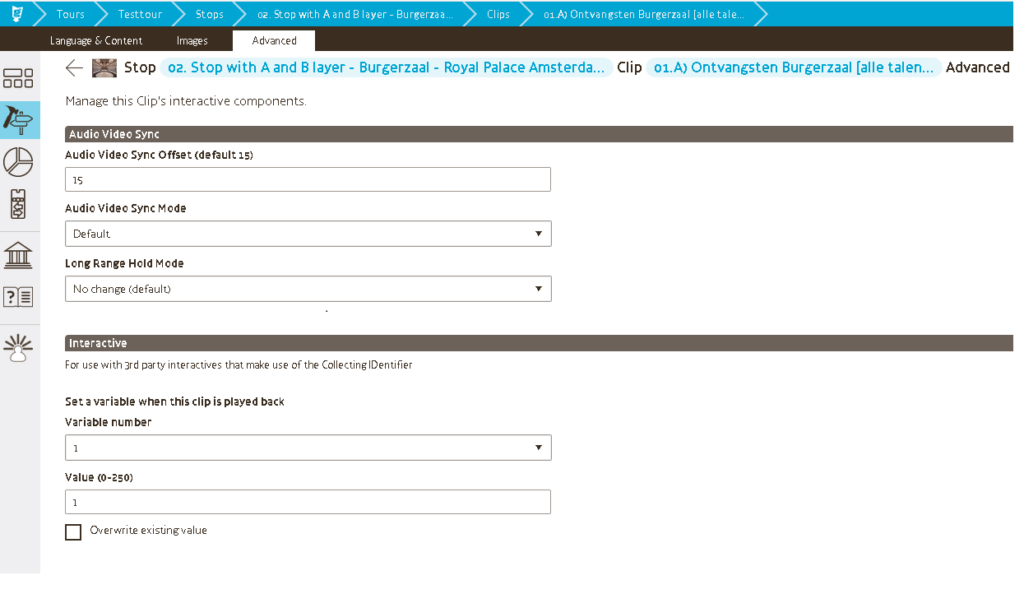
- A different variable needs to be entered for each clip you want to track when using layers. The value can stay the same.
- If you are asking a question to the visitor where they have to make a choice using the A/B and or C button, you will have to enter the same variable to each clip, but change the values per clip.
- repeat these steps for each clip you would like to track
- Publish the Tour and Sync so the Podcatcher will sync the content on to its SD card.
Installing the Interactive IDentifier
Connect the Interactive IDentifier to a usb port on the Windows PC on which the interactive application will be running.
Install the driver (not necessary for Windows 10)
If you are using Windows 7 or 8, download Driver.zip from http://apps.podcatcher.eu/download/pub/collectingid and extract the .inf file.
Go to Windows Device Manager, select the Collecting IDentifier and set it up to use the .inf file as a driver.
(For Windows 8, Windows first needs to be configured to use unsigned drivers. Follow the instructions on http://www.howtogeek.com/167723/how-to-disable-driver-signature-verification-on-64-bit-windows-8.1-so-that-you-can-install-unsigned-drivers/ to set this up).
Install the Collecting IDentifier Service (required)
Download CollectingIDentifier.1.2.6176.24055.zip from http://apps.podcatcher.eu/download/pub/collectingid
– IMPORTANT: After downloading the .zip file, right-click the file and select Properties. There click ‘Unblock’.
– Extract the contents of the zip file to C:\Program Files\Guide ID\CollectingIDentifier
– Open a command prompt with administrator privileges and go to C:\windows\Microsoft.NET\Framework\v4.0.30319 . From there, enter:
installutil "C:\Program Files\Guide ID\CollectingIDentifier\service.exe"
The service will automatically start when Windows is started. Either restart the computer to start the service, or go to Windows Services, find ‘Collecting IDentifier Service’ and start it manually.
Communicating with the service
You can connect to the Collecting IDentifier Service by opening a TCP socket to localhost on port 777.
You will start to receive JSON messages periodically (heartbeat) or when a Podcatcher is sending data. (The Podcatcher needs to be activated before it communicates with the Interactive IDentifier).
The JSON messages are explained here.
Usage
The visitor can use the Interactive IDentifier by pointing the Podcatcher at the IDentifier, just like any other IDentifier. He or she will hear the audio file which has been uploaded or can follow the instructions on the screen of the interactive application.
Troubleshooting
Should the Interactive IDentifier not work properly, please check the following first:
- Have you activated the Podcatcher with a Start IDentifier?
- Is the USB cable properly connected to the Windows PC on which the interactive application is running?
- Is the Windows PC on which the Interactive application is running switched on? if not restart the PC or contact the third party responsible for the Interactive application.
- Is the interactive application running properly? if not contact the third party responsible for the Interactive application.
- If the Interactive should start an audio file on the Podcatcher, and it doesn’t check the TourEditor
- if the audio files have been uploaded
- if the IDentifier code is connected
- if the content has been published
- Has the Podcatcher been synchronized with the correct content?
If that didn’t solve your problem, unplug the Interactive IDentifier from the USB cable and reconnect it.
I have received the hardware, what next?
Note; You can start building your new tour in the Toureditor without the hardware being present.
As soon as you receive the hardware from us, you can finalize the tour by connecting the IDentifiers (triggers) to the stops in your tour. You need to connect at least one IDentifier to each stop in your tour. Every IDentifier has a unique number which you can find on the back of the IDentifier (for example EF:FF:FF:43).
There will be 1 or more IDentifiers with a language/country flag, these need to be connected as a Start IDentifier for the different languages in which you provide the tour. (Note; you need a different IDentifier for each language).
When all the stops are added in the tour (have an IDentifier connected and contain an audio file) you need to “publish” the new tour. After that you can mount the IDentifiers next to the objects in the exhibition.
The rest of the installation is very simple;
- Connect the Dockingstations to the Sync Console or Syncbox that we have provided and plug everything into the power socket.
Note; a Sync Console will already be installed and linked to your site. A Syncbox needs to be connected by the customer (see instructions) - Insert the Podcatchers firmly
- Connect the Sync Console or Syncbox to a wired internet connection (note the whole set up needs to stay connected to power and internet 24/7)
- Start the Sync Console or Syncbox
- Log on to the Podcatcher Portal, go to “sync” and press Sync Now.
- Now the content will be synced on to the Podcatchers.
We have made an instruction video available as well. In this particular video we show you how to install the setup with loose, new Dockingstations and a Syncbox.
The 10 Podcatchers in a Dockingstation are synced one after another, but all connected Dockingstations start and sync simultaneously.
When a Podcatcher light turns green, you can take it out and start testing your new tour.
Every day our server connects automatically to the PC provided, and checks the Podcatchers to ensure updates are written on to the Podcatcher, to restore Podcatchers which have an error and to retrieve the logs and statistics from the Podcatchers to add to the Analytics.
Please feel free to contact helpdesk@guideid.com if you have any questions.
How do I clean the Podcatchers?
Gently wipe them with a slightly moist soft cloth with a regular all-purpose household cleaning product, or use a disposable all- purpose cleaning tissue. Please keep water temperature below 60 °C to prevent degradation of the Podcatcher plastic.
We suggest to use normal (all-purpose) cleaning products, or specific types of alcohol wipes to clean the Podcatcher:
- Soap
- Ajax cleaner
- Detergents
- Isopropyl Alcohol (IPA) wipes
- Ethyl Alcohol wipes (Ethanol, with concentration up to 96%)
Make sure not to use acetone or ammonia based cleaning products, or to expose the Podcatcher to strong bases or acids.
AV-Sync DIP-switch settings
When using AV-Sync, you need to set up the DIP-switches on the AV-Sync Box. These DIP-switches are linked to the IDentifier codes in the TourEditor.
You’ll find a full list of codes with DIP-switch settings here: Specsheet AV-Sync DIP switch
Introduction to the Podcatcher hardware
This article intends to familiarize you with the concepts that make the Podcatcher work. It’s a short introduction about our different hardware products that are needed for a working audio guide.
Podcatcher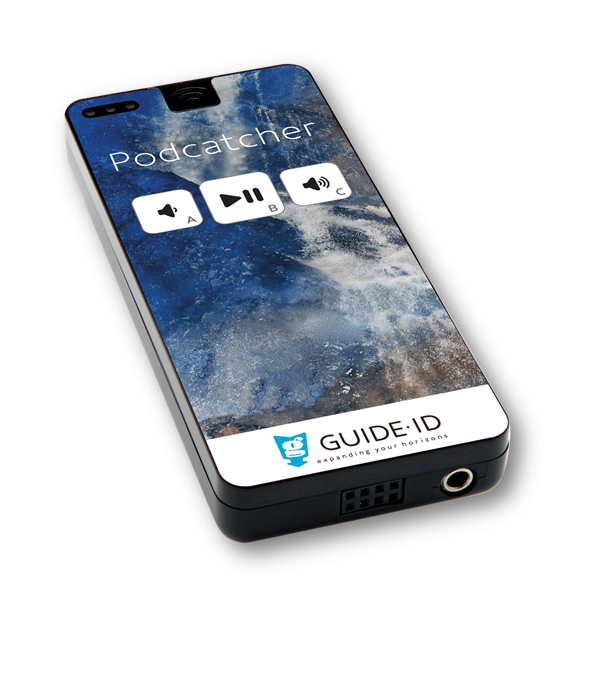
The Podcatcher is our main device and visitors use it by pointing at an IDentifier, much like a TV remote. The Podcatcher will then play the audio associated with it. The IDentifier has a sticker on the back with a code; it sends this code out using infrared signals. By linking this code to a stop in the Podcatcher Portal, the Podcatcher knows which audio to play when it’s pointed at an IDentifier.
 IDentifier
IDentifiers are the small square devices used to – as its name implies – identify which audio should be played when a Podcatcher receives its signal.
There are a handful of different kinds of IDentifiers. The most basic and most common one is called an Object IDentifier. It’s typically used in conjunction with an object, artwork or room. Visitors point their Podcatcher at the IDentifier, and the Podcatcher starts playing the audio. An IDentifier can be used in multiple Tours, for example the adults’ and childrens’ Tours can use the same IDentifier but with different audio.
Starting an audio tour is done with a Start IDentifier. These start a Tour in a given language and usually have a country’s flag printed on the front to indicate what language it is. A particular Start IDentifier can only be used once per audio tour, because otherwise the Podcatcher would not know which audio tour to start.
There are other IDentifiers as well. For more information about all the IDentifiers, please read the article about IDentifiers.
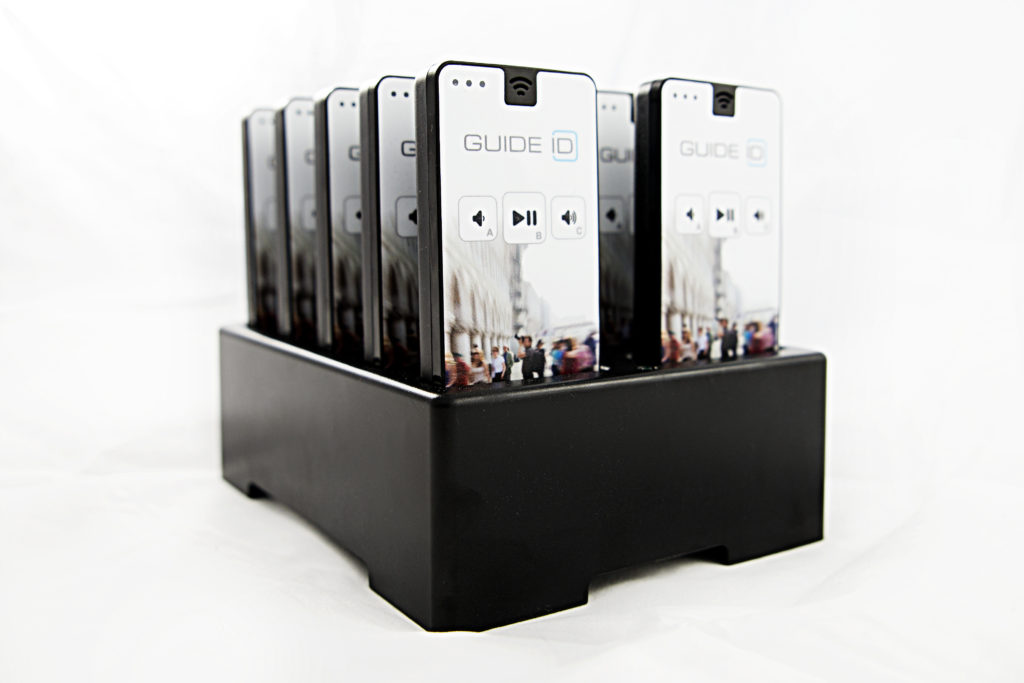 Dockingstation and sync console
Podcatchers have to be recharged periodically. This is done, along with installing any new software for the player and receiving new audio files that have been published, by putting them into a docking station. The docking station is connected to power and to a computer with the Podcatcher Sync software installed; a Sync Console. By default, the sync console will attempt to synchronize files daily at 19:00 (7 PM) local time.
If you want more in depth information about all the products, go to the homepage and unfold the tabs under ‘The Podcatcher System – Hardware’
Or read the Introduction to the Podcatcher Portal, the online system where you can built your audio tour.
Podcatcher
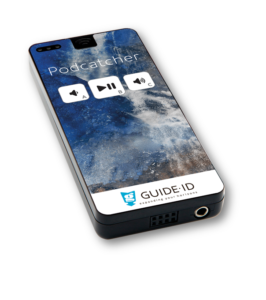
The Podcatcher is Guide ID’s audio device. It’s designed to be simple to use and sturdy enough to last a while. This page intends to detail what it can do and how the most common activities the Podcatcher can perform, work.
Essential features
IR receiver:
While concealed, the infrared receiver is located at the very tip at the top of the device – like a TV remote.
Speaker:
The speaker is located at the top of the front of the device – like a phone.
Storage:
The Podcatcher stores its content, firmware and log files on an SD card inside the casing.
These three things, in essence, enable the Podcatcher to play the audio it needs to. The circuit board handles things like playing MP3s and finding the correct content to play.
Buttons:
The basic Podcatcher has three buttons:
- The left button acts both as a ‘volume down’ button when playing regular audio clips, and as ‘option A’ when in a Clip that has A/B/C options.
- The middle button acts both as a ‘pause/play’ button and as ‘option B’.
- The right button acts both as ‘volume up’ and as ‘option C’.
With just these buttons, you can create not just informative experiences, but also quizzes, surveys and more.
Visitor usage
At the most basic level, all a visitor needs to do is use the Podcatcher as a hybrid between a TV remote (pointing at IDentifiers) and a phone (listening to it). The typical visitor experience looks something like this:
- Receive a Podcatcher, either from a handout point or from self-service.
- Point the Podcatcher at a Start IDentifier with the desired language (read more on those, here).
- Experience the museum with the added benefit of having a mind-blowing audio tour.
- (optional) Register the Podcatcher with MapMyVisit so the visitor can look at the tour again at home.
- Return the Podcatcher to the museum.
As you can see, super simple stuff.
Syncing (charging battery & updating content)
Podcatchers have to be recharged periodically. This is done, along with installing any new software for the player and receiving new audio files that have been published, by putting them into a docking station connected to a computer with the Podcatcher Sync software – a sync console. By default, the sync console will attempt to synchronize files daily at 19:00 (7 PM) local time.
To sync a Podcatcher, it has to be placed in a Docking station connected to a working Sync Console first. Then you can either:
- Wait for the daily sync to happen;
- Schedule a sync in the Podcatcher Portal;
- Click ‘Sync Now’ in the Podcatcher Sync application to start a sync directly
Podcatcher settings
The Podcatcher has a handful of settings you can tweak to suit your needs, most notably settings related to speaker volume. Refer to this article for information.
Specsheet
For an overview of the features and measurements of the Podcatcher, please take a look at the Specsheet of the Podcatcher.
IDentifiers
There are a handful of different IDentifiers available. This page intends to distinguish them and explain what each of them is used for.
Object IDentifier
The Object IDentifier is the most basic of the bunch, but also the most common one. This type of IDentifier simply sends out an infrared code – the code is unique to each IDentifier, and is printed on the back of the device – which the Podcatcher can pick up and interpret. Codes look like “EF:FE:1C:AE”; four sets of two characters.
Object IDentifiers can be linked to one Stop per Tour, but can be used in multiple Tours. Further, they can’t be used as both a Start IDentifier and an Object IDentifier at the same time.
Usage
Write down the code printed on the back and link it to a Stop in the TourEditor. Place the IDentifier near the Stop – next to a painting, at the entrance to a room, and so on – and point the Podcatcher at it. The Podcatcher will now play that Stop’s content.
Battery lifespan
The battery on an IDentifier lasts for quite a while – under optimal conditions they can keep going for upwards of two years. They will eventually run out though, but it’s fairly simple to replace them.
 Start IDentifiers
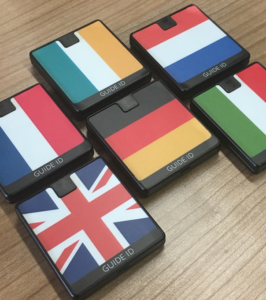
Start IDentifiers are essentially Object IDentifiers, but they have a flag printed on the label to designate which language they represent. A Start IDentifier, as the name implies, starts a Tour. Coupled with the flag, they represent the start of a Tour in a given language.
Start IDentifiers have the same kind of code as Object IDentifiers, but a Start IDentifier’s code can only be linked to a Site once – otherwise a Podcatcher wouldn’t know which Tour to start (or in which language).
Read more about starting a tour (and Start IDentifiers) here.
AV-Sync IDentifiers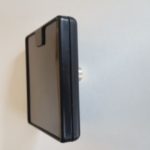
AV-Sync IDentifiers are more complex than the Object IDentifier, because they need to send out IR signals not just for their IDentifier code, but also the time stamp for the video. To be more precise, they are connected to an AV-Sync box which does most of the legwork, but an AV-Sync IDentifier can’t operate on its own either way. Refer to the AV-Sync user manual for an in-depth explanation of what the AV-Sync IDentifier does and how it can be installed.
 English
  Nederlands
  Français