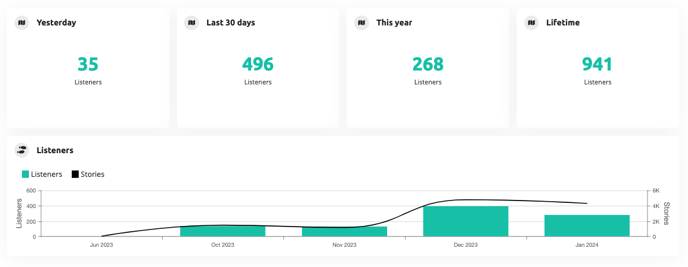
Your dashboard provides a snapshot of the performance metrics related to your audio tours. It helps you evaluate how well they are doing and plan for future improvements.
Tour data
The tour data section shows you how many visitors your site has served with audio tours in the past day, thirty days, this year, and the total number of tours.
Tours played
The tours played graph offers a detailed breakdown of the number of tours served throughout the past year. This information is further segmented based on the platform used, allowing you to analyze tour consumption across different channels such as the Podcatcher and PWA.
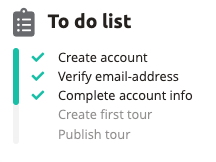
To do list
Lastly, the to-do list feature guides you through the necessary steps to ensure your audio tours are ready for your visitors. This convenient checklist helps you stay organized and ensures a seamless experience for your audience.
Your other Podcatchers should continue working normally
Why this happens
The Podcatcher has experienced a hardware failure and needs to be replaced.
IDentifer Battery Low
🟡 Medium Priority
What this means
An IDentifier’s battery has dropped below one-third capacity. You still have several weeks to months of battery life remaining.
What to do
Replace the batteries of the IDentifier or replace the IDentifier with an other IDentifier.
Why this happens
Battery levels update when a Podcatcher scans the IDentifier and syncs with a Sync Device.
Podcatcher Not Seen for a Week
🟢 Low Priority
What this means
We haven’t detected this Podcatcher in over a week, but less than a month.
What to do
If you have the Podcatcher, place it back in a Basecamp
If you’ve already returned it, we may still be processing it – the notification will clear automatically
The notification will stop after 30 days
Why this happens
The Podcatcher may have been left out, used for testing, or returned but not yet processed in our system. For more information, see our Missing Podcatchers FAQ.
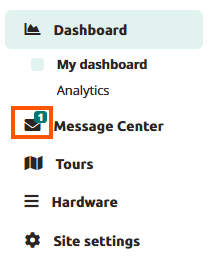
The Message Center will show all kinds of notifications regarding “actionable insights”. This usually means the museum needs to take actions to fix something.
The color bar on the left indicates the severity of the notification:
🟢 Green
Low severity : informational, no action required or at least not immediate
🟠 Orange
Medium severity : action required, however not immediate
🔴 Red
High severity : immediate action required
The meaning of the severity may be subject to change as soon as we have actual notifications with different severities.
The icon indicates the type of notification
The message text informs you about what is going on and in some cases what needs to be done to resolve the issue.
The date is when the notification was created. The date is bold when the message is unread.
The X allows you to dismiss this notificatoin. You won’t receive any email reminders on this message (if you are subscribed to weekly notifications). After pressing X, the message will disappear from the overview.
The messagelist is seperated into two lists divided by a line seperator (see below) when there are unread messages since the last visit to Message Center. The first list contains the new (unread) messages since the last time this page was loaded. The second list contains the messages which are read. Messages get automatically marked as read when the Message Center page is loaded. So the next time you come to the Message Center page, all these messages are marked as read.
The Platform checks for new notifications every 15 minutes. If a new notification is available, the number displayed on the message center icon is updated accordingly.
Supported notifications
IDentifier Battery Low When a low battery is detected on an IDentifier this notifications will show up per IDentifier.
IDentifier Battery will need to be replaced.
When the IDentifier is deleted from the Hardware IDentifiers page, the notification will be removed.
Podcatcher Error When the Podcatcher is in error status, this notification will show up per Podcatcher. These Podcatchers will need to be returned.You can reach out the repairs or returning equipment page.
If the Podcatcher moved to a new Sync Device, the old notification will be removed. The new notification with the correct serial number will be created. When the Podcatcher is healthy again, this notification will be removed.
If you click on ‘Basecamp‘ and there is information about the latest docked Basecamp for Podcatcher, they will be navigated to the Basecamp detail page. If ther is no such information available, they will be directed to the Basecamp overview page instead.
Sync Device Offline
When a Sync Device has been offline for more than one day, this notification will show up per Sync Device. Power and network connection should be checked first. When the Sync Device is online again, this notification will be removed.
If you click on ‘Sync overview page‘, you will be navigated to the Sync Device overview page. This notification takes SyncDevice type into account, text message change for each SyncDevice type (SyncConsole, Syncbox).
Lost Podcatcher If the Podcatchers that have a last seen of over a week ago, this notification of total number of Podcatchers will show up per site.
If there is an Warning IDentifier, it needs to be checked.
Lost Podcatchers checked Periodically. When a previously lost Podcatcher is seen again, it is removed from the lost count.
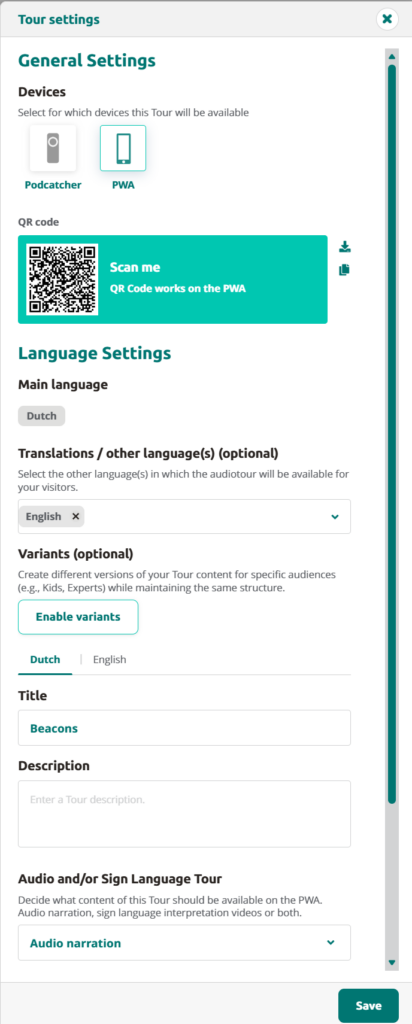
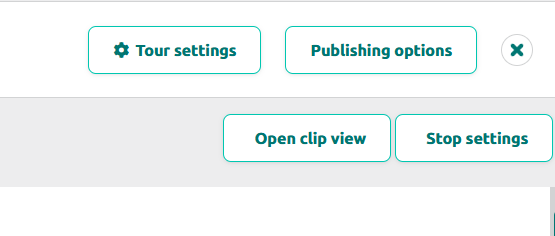
To access the tour settings, go to the tour page and click on Tour Settings located in the top-right corner of the page. This will open up the Tour Settings pop-up.
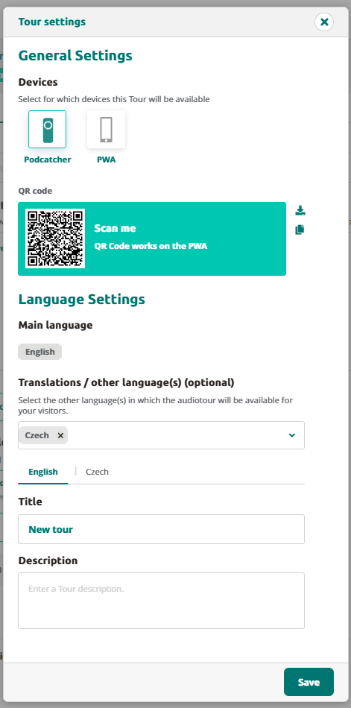
The Tour Settings pop-up displays general information about the tour. To apply any changes, make the necessary edits and then click the Savebutton.
In the General Settings section, you can select which devices this tour will be available on.
In the Language Settings section below, you can select which languages the tour will be available in. Please note that it is not possible to change the main language of the tour once it has been set.
You can also customize the translated title and description of the tour for each available language.
By adjusting these settings, you can ensure that your tour is optimized for your target audience, making it more accessible and appealing to a wider range of users.
Adding layers can serve a variety of functions, for example when your main audio fragment for a stop becomes lengthy, you can provide more detailed information by adding a layer. For instance, you can present historical background or details about an art piece as a separate layer. This way, visitors who are not as interested in the history can still enjoy the primary story of the art.
Adding layers
To add a layer to your tour, follow these steps:
Click on a stop within the tour.
Click on “Open clip view”
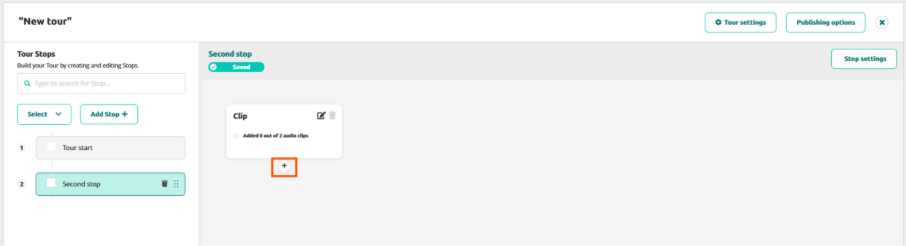
Hover your mouse cursor over the clip, and a small “+” icon will appear.
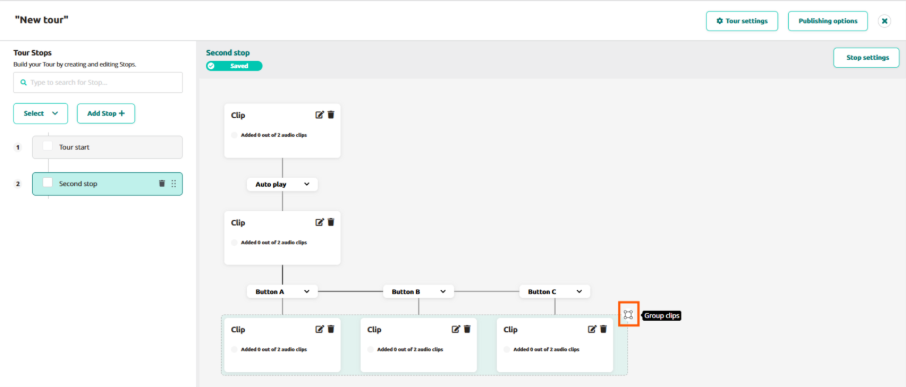
Click the “+” icon, and a new clip will appear with a line connecting it to the previous clip, labeled as “Auto play.”Users can choose any of the four options: A, B, C, or Auto Play
At this point, the layer has been added, and the purpose of adding the layer becomes relevant.
If you want to include an optional segment of audio, click the “Auto Play” dropdown button and select any of the available A/B/C buttons. It’s essential to provide an explanation in the first clip to guide visitors. For example, you can include text such as “Press A to learn more about the painter’s life.”
Multiple clips require more than one option or button. Simply click on the “+” icon . After selecting Button A, the lines connecting the clips will automatically change from “B” to “C” when clicking on “+” icon.
You can click the group icon to group the clips together and ungroup them. Grouped clips share the outgoing connection, ensuring that the following clip remains the same regardless of the chosen option.
For additional layers, click the “+” button below a clip or group and repeat the process. Note that if you want to chain a clip group to another group, you need to include an “in-between” clip. This step is crucial to ensure proper advancement through the tour, otherwise the Podcatcher wouldn’t know which of the following clips it needs to play to advance..
By incorporating layers into your tour, you can create a more engaging and interactive experience for visitors. These layers add depth, personalization, and an element of fun to your tours.
Transform Your Exhibition Ideas into Complete Audio Experiences
The AI Tour Generation feature in the Guide-ID platform allows you to rapidly create engaging audio tours with minimal effort. This powerful tool takes your basic exhibition information and transforms it into professional, ready-to-use audio stops with consistent narration and optional translations.
Prerequisites
Before starting, ensure you have:
Active Guide-ID platform account with administrator privileges
Basic exhibition information (titles, themes, key artifacts)
Clear understanding of your target audience and tour objectives
Approximately 5-10 minutes of time for initial setup (generation occurs in the background)
Step-by-Step Instructions
1. Initiate Tour Creation
Log in to the Guide-ID platform
Navigate to Tours > Create New Tour
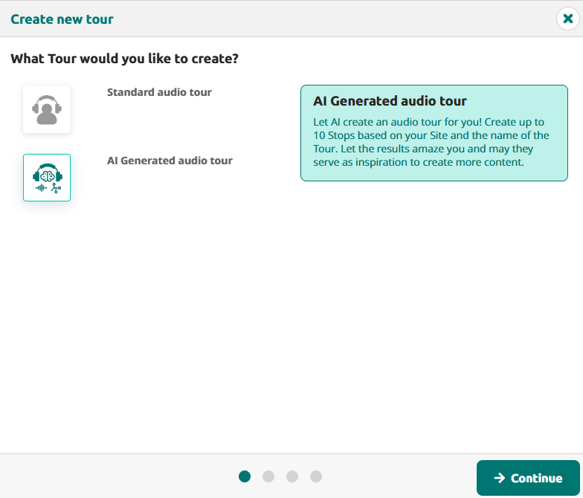
In the tour creation wizard, select AI-Generated Tour option
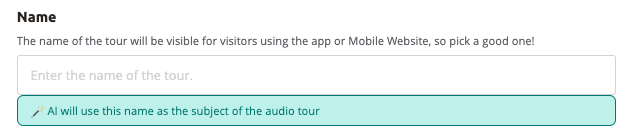
Enter a descriptive title for your tour, it will be used as subject of the audio tour
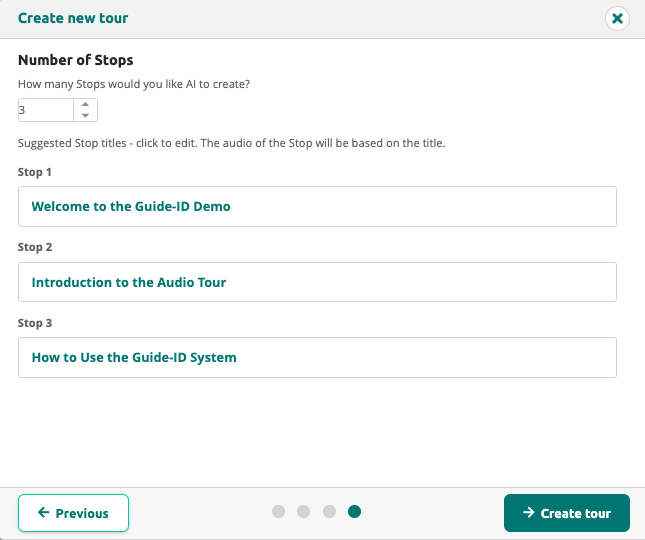
Select the number of stops (2-10)
The Stop titles are immediately suggested. Change them to have a different theme/focus per stop
Click “Create tour”
Tip: Choose titles that helps the AI understand what the focus of the tour should be
2. Review the created tour
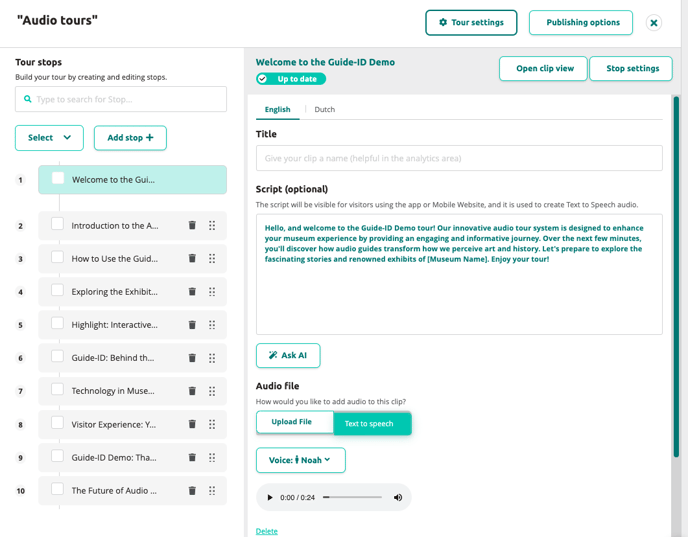
Stand by AI is pondering, it normally takes between 1-5 minutes to create the tour. when it is done the following is created
A transcript per language
With the help of randomly selected voices the audio is generated
For each individual stop, review
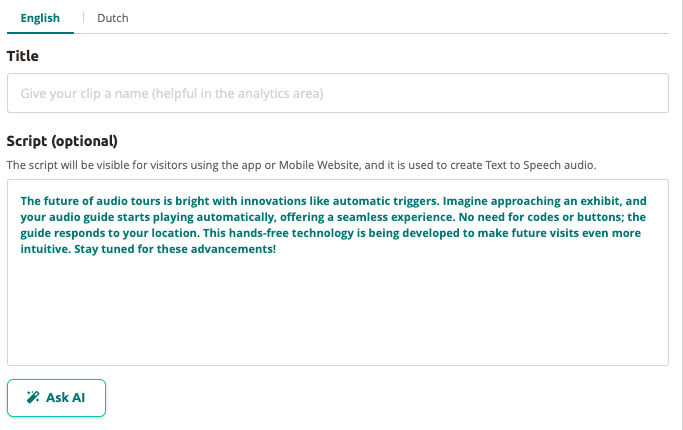
Script: read the script and/or listen to the generated audio. Finetune the fragments where needed
Voices: the voices are selected randomly,
you can use “Ask AI” to change the tone of voice or create new translations.
Next Steps
After creating your AI-generated tour, publish and sync it.
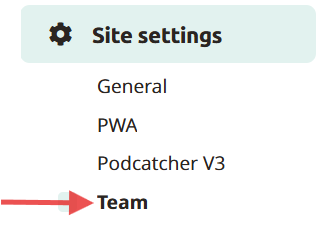
To add team members so that they can log into the Platform, simply go to Site settings and click on team.
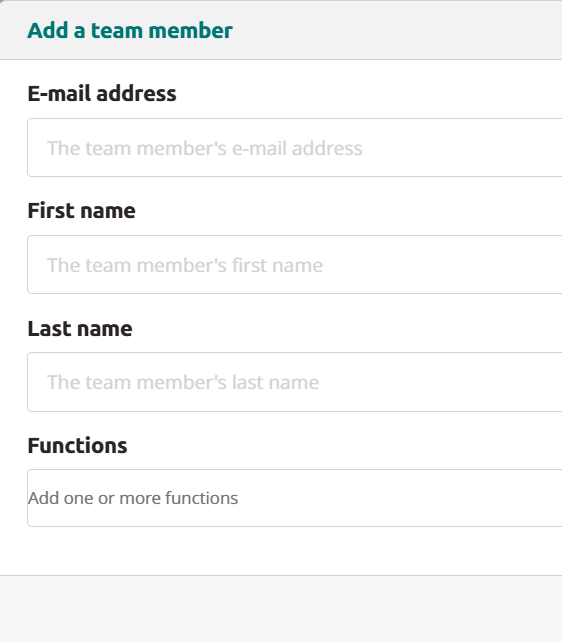
Here you can add team members by clicking on Add new teammate. Fill in their e-mail address, first- and last name (function is optional) and click on save. The team member will receive an e-mail. When clicking on the link in the e-mail they can registrate their account and log on to the Platform.
Changing or deleting account
To change or delete an account, simply click on the edit or delete icon mentioned under actions for that e-mail address.
With the migration to our Podcatcher Platform we’ve changed the Mobile Website to PWA(Progressive Web App).
PWA offers several convenient features designed to streamline access for both you and your visitors.
Acces PWA
Finding the page
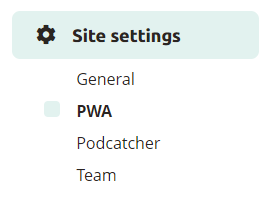
To access the PWA settings and its accessibility options, navigate to Site Settings and select PWA (Mobile Website).
QR Code
Instead of manually typing the code, visitors can conveniently scan a QR code. This can be achieved by displaying the code on printouts near the tour’s starting point or on your counter. Simply click the download button to obtain a scalable QR code version. When a smartphone scans the QR code using a dedicated app or the device’s camera, visitors will be automatically redirected to your Mobile Website page.
Design
To improve site recognition, it is highly recommended to upload a cover image for your PWA. Click the “Upload image” button to get started, select an image to upload, and crop it to the specified aspect ratio. Upon clicking “Save,” you can immediately observe the applied changes.
By utilizing these PWA features, you can improve accessibility for visitors, simplify access via custom URLs and QR codes, and enhance the visual appeal of your site with a personalized cover image.
How to enable PWA
To enable PWA simply go to Tours, select the tour you want to make available for PWA and go to the tour settings. To activate PWA, click on PWA. If it is highlighted with a green border, it is actiated. If the green border is not displayed, then PWA is not active. Then click Save at the bottom right.
To use the QR code, copy or download the QR code from the tour settings. You can also find the QR code via Site Settings > PWA.
When the visitor scans the QR code with their mobile phone, they will see the following:
The visitor will be advised about their surroundings when using PWA and will be advised to use headphones or earphones.
If PWA is activated for multiple tours, the visitor can select which tour they want to listen to.
Depending on the language available for the tour, the visitor can select the desired language.
To listen to the desired stop, the visitor selects the stop.
After that, they can listen to the stop.
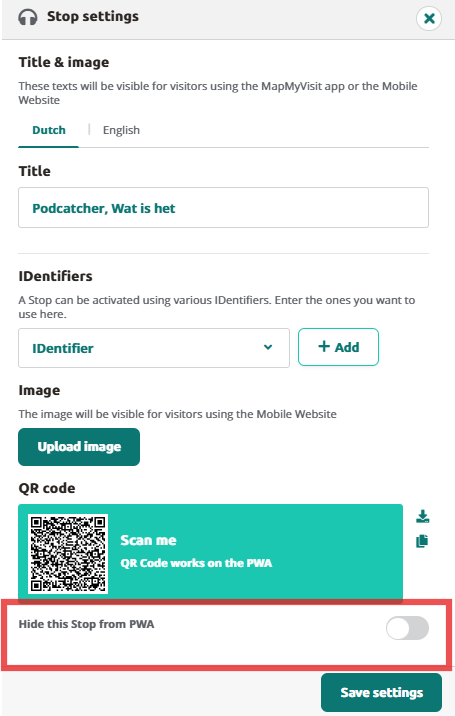
How to exclude a stop for PWA
To exclude a stop for PWA go to Stop Settings and click on the toggle Hide this Stop for PWA.
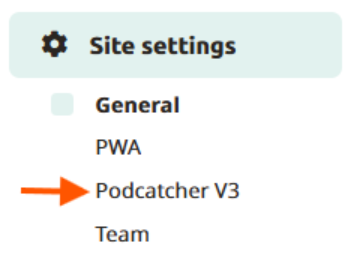
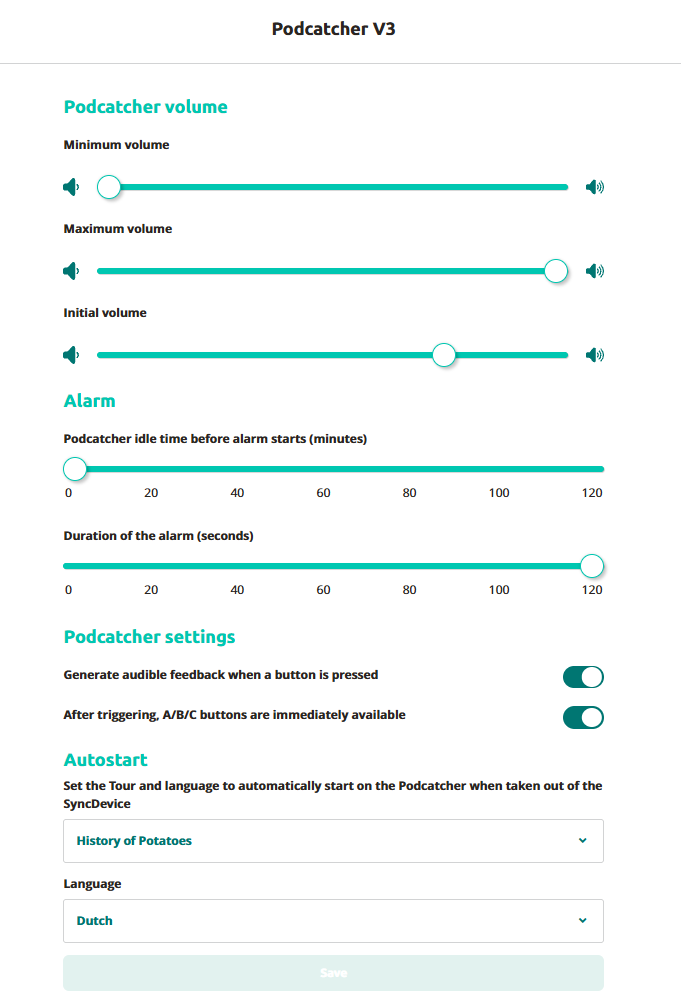
Here you will be able to adjust the volume, Alarm, Podcatcher settings and Autostart. Go to Site Settings and click on Podcatcher V3.
Podcather Volume
The toggle to the left represents the minimum volume, whereas the toggle to the right represents the maximum volume
Minimum volume: Minimum volume that can be set by the visitor when they press the volume down button.
Maximum volume: Maximum volume that can be set by the visitor.
Initial volume: The Podcatcher’s initial volume when it is taken out of its dock
Alarm
The Podcatcher can sound a warning signal if it ‘thinks’ it’s being taken out of site. See this article for more information.
How long should the alarm last?
As of the 17th of April 2026, new customers will no longer be able to change the duration of the alarm. This stops when the podcatcher is returned to the docking station or when an IDentifier is triggered.
Customers before this date still have the abilty to change the duration of the alarm. Overtime this too will be changed.
Podcatcher settings
Generate audible feedback when a button is pressed: When this checkbox is checked, the Podcatcher will make an audible click noise when a button is pressed.
A/B/C buttons: When selecting the A/B/C buttons are available
Autostart
Automatically starts the tour on the Podcatcher when taken out of the Syncdevice.
Click on the dropdown menu to select the tour to automaticilly start
Select the language of your preference to automatically start the tour.
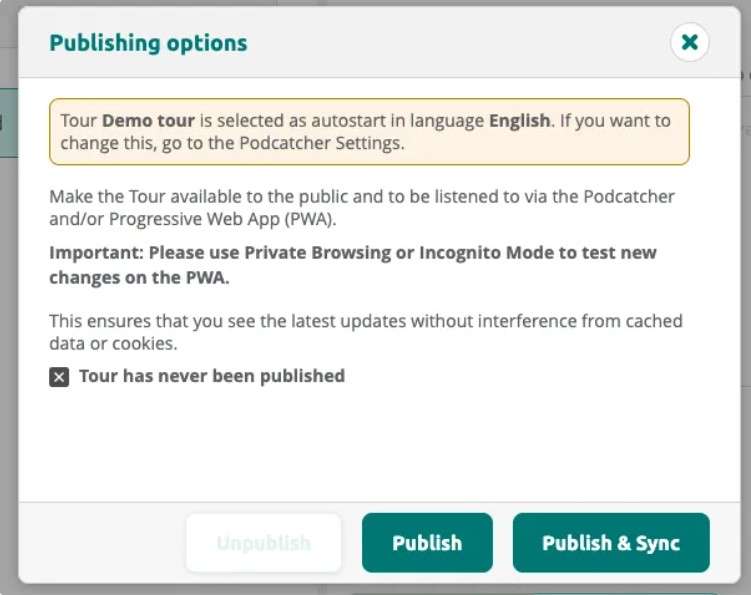
Publishing a tour means making the latest version of your tour available to visitors.
Any change made so far is only visible in the tour builder, but not yet on the Podcatcher or other devices.
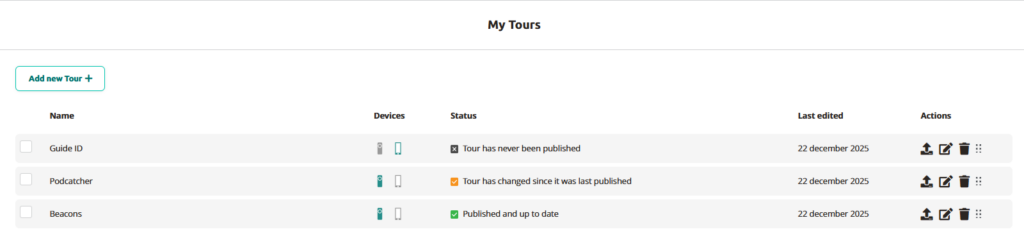
There are three publishing “states” a tour can be in:
Tour has never been published: The tour has not yet been made available.
Tour is unpublished: The tour was published before but is currently not accessible to visitors.
Published and up to date: The current content is live and matches what visitors receive.
Tour has changed since it was last published: The tour has been modified since the last publish — republish to push the changes.
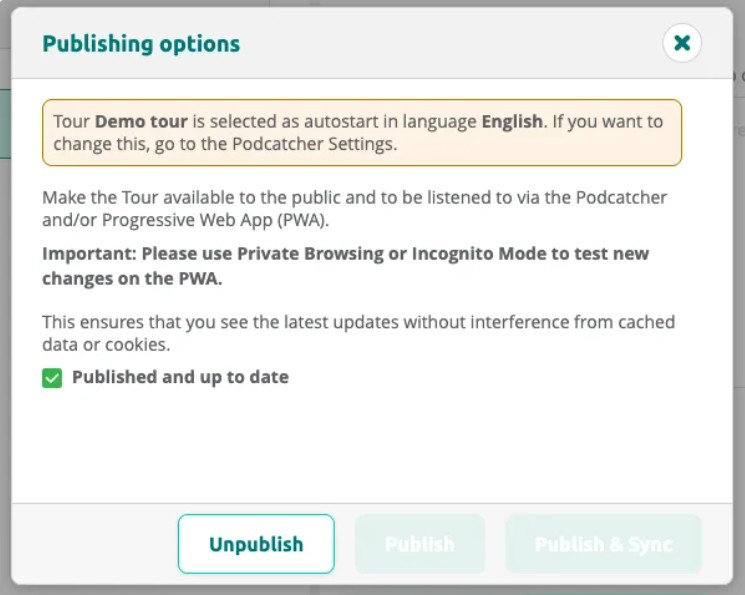
Once you’re happy with your tour, go publish it. Go to the tour and select the Publishing Options button at the top-right of thetour page.
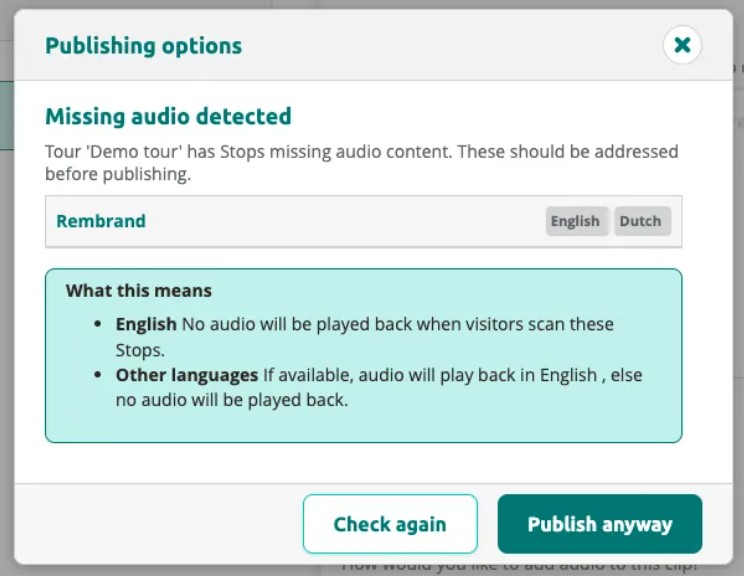
Clicking the button will bring up a dialog where any missing content is listed, as well as allowing you to see what has changed since the last time you published.
If the tour has stops with missing audio, the dialog warns you before publishing. You can choose to fix the issues or publish anyway.
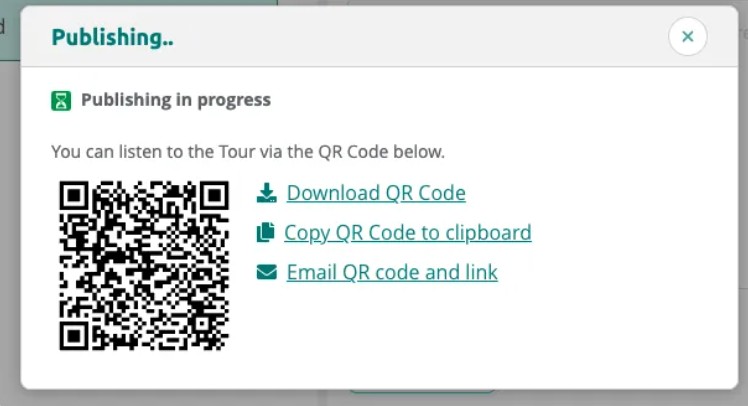
Click Publish or Publish & Sync to start publishing. The dialog shows a QR code you can use to test the tour on the PWA.
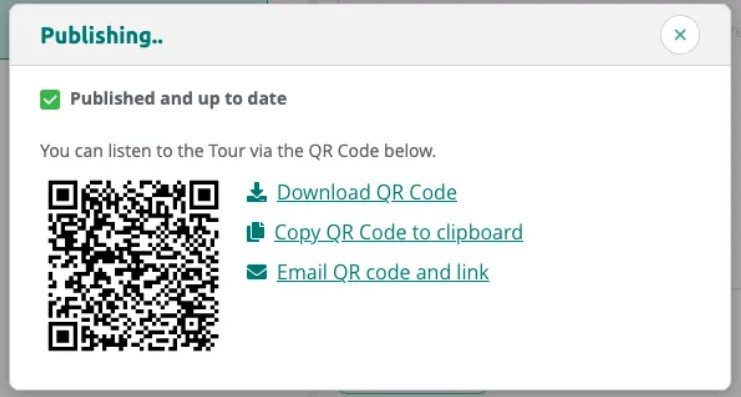
Once publishing is complete, the status changes to Published and up to date.
Viewing Tour Status
After publishing, the dialog confirms the tour is up to date. You can unpublish the tour at any time to make it unavailable to visitors.
In the My Tours list you can easily see the status of each tour.
For the Podcatcher the synchronisation is still needed for each Podcatchers to have the latest content & changes. This is often scheduled in the evening.
To publish the tour in My tours, simply click on the icon with the arrow facing up.









-1.png?width=242&height=242&name=6%20(1)-1.png)
.png?width=390&height=389&name=1%20(1).png)
.png?width=390&height=390&name=2%20(1).png)
.png?width=390&height=389&name=3%20(1).png)
.png?width=390&height=389&name=4%20(1).png)
.png?width=390&height=389&name=5%20(1).png)
 English
  Nederlands
  Français