Introduction
There are several ways to minimize the risk of losing Podcatchers. In this specsheet you’ll find a number of tips and best practices.
Other ways
When a visitor uses a Podcatcher, you can expect them to return it after use. However, some visitors may neglect, or simply forget to do so. To lower the amount of Podcatchers ‘disappearing’ over time, there are several ways to activate a warning signal built into the Podcatcher to alert visitors they should return the device.
Warning IDentifier 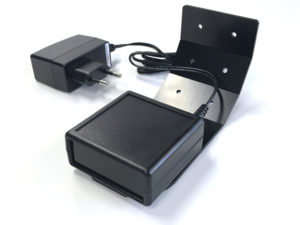
The Podcatcher can sound its warning signal when it receives a Warning IDentifier code. This is a special IDentifier that is typically placed near the building exit so visitors should be notified at the right time.
Warning signal after idle time
The Podcatcher can also sound an warning signal when it is engaged in a Tour but has not played audio for a while. By default this functionality is turned off, but you can set it up in the Site Podcatcher settings, under “Podcatcher idle time before alarm starts”.
The advantage of this method is that the warning signal will always sound after a while, unless properly handed in. The disadvantages are that if you set it to sound the warning signal too quickly, visitors may become annoyed; if you set it to sound the warning signal too late, the visitor may already be on the bus back home by the time it goes off. Further, if your site doesn’t collect Podcatchers in docks after visitors finish the tour (such as a drop-off box), they may start to produce a very annoying chorus over time.
Post-Alarm trigger
The Podcatcher can be made to play audio after sounding the warning signal using the Post-Alarm trigger in a stop. This will make the stop play its audio after the warning signal has stopped playing (either due to it playing for its full duration or a button being pressed). This is – as all content is – localized to the language of the tour.
Designing your own furniture
If you would like to design a furniture for our Podcatchers, you can choose between a design using loose Dockingstations or a design where you use a cabinet block which you slide into the furniture.
When you are designing a furniture this is what you need to keep in mind;
- The design is of course very dependent on the number of Podcatchers that you want to supply to your visitors. (Make sure to think about the future, when you might want to add players).
- Per 10 Podcatchers you will receive 1 Dockingstation
- When designing for loose Dockingstations; each Dockingstation has its own USB cable (and power-adapter with older Dockingstations) which needs to be connected to the Syncbox. So make sure to keep enough space available behind the Dockingstations for these cables (and extension courts when needed)
- Up to 10 Dockingstation (or 1 cabinet block) can be directly connected to one single Syncbox, which in turn needs to be connected to the internet. The cable length of the USB cable from each loose Dockingstation to the Syncbox is 90 CM, so the Syncbox needs to be placed near the Dockingstations. Because the USB cables also power the dockingstations, a Hub can not be used to extend the length of the cables.
- When using a Cabinet block the cables are already connected inside the block and the Syncbox is placed in the back if the block (see the manual)
- When designing for loose Dockinstations; keep room for the Syncbox(es). Depending on the set up, you will probably have to use multiple Syncboxes (100 Podcatchers can be connected to 1 Syncbox)
- It is also important to take into account where you place the Syncbox because it must be easily accessible if you have to restart it.
In addition, it is also important that you have easy access to the back of the furniture unit, if there are problems with a USB cable / power adapters /extension cords / switch etc.
- The entire setup must be connected 24/7 to power and a wired internet connection for the correct operation of the system.
- Also make sure the furniture has enough possibilities to ventilate warm air.
- Don’t place the top row with Dockingstations to high, otherwise you cannot see the lights (the status) of the Podcatchers
- Don’t place the bottom row with Dockingstations to low.
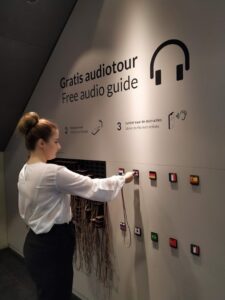
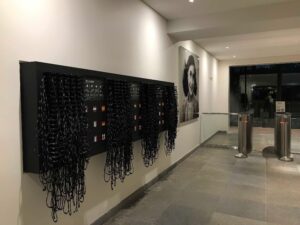
Each Podcatcher is equipped with a neck lanyard. When the Podcatchers are placed in the Dockingstations, the lanyards hang down. So if the bottom row is to low, the lanyards will hang on the floor.
- We recommend to place the lowest row of Dockingstations at a height of at least 100 cm from the ground. That way they are still easy to access for infants and visitors in a wheelchair.
- We have 4 info-graphics available that explain the handout of the Podcatcher which you can add to the (self-service) furniture if you like; https://help.guideid.com/kb/icons-for-signage/
Also important
We strongly advise not to use drawers in your furniture design for the distribution of the Podcatchers for several reasons; the USB cables (and power adapters) that are connected to each Dockingstation will be under tension constantly when sliding the drawers in and out. In addition, the cords can easily get stuck and you cannot properly detect wear on the wiring. Chances are also very high that cables are pulled from the Syncbox so no connection can be made when synchronizing, which in turn ensures that not all Podcatchers are synchronized
Take your visitor flow into account (with self-service, the amount of visitors able to access the furniture at the same time) and how you would like to lead them. When having one furniture for instance there are 2 flows; visitors who have just entered the museum and need to be able to easily access the furniture, to take out and activate a Podcatcher. While the second flow (visitors who are leaving the museum) must return their Podcatcher. These two flows should not interfere with each other.
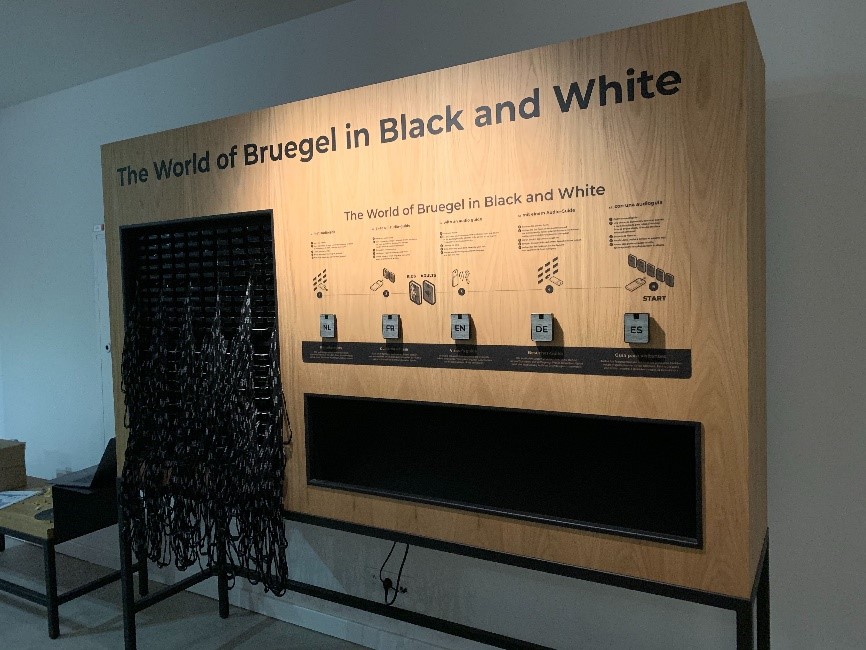
Placement of the Start IDentifiers
To activate a language, you need to point your Podcatcher at a Start IDentifier. These are always placed at (or near) the distribution point.
You can either integrate them in the furniture or make a separate board where people can activate their Podcatchers (so separate from the furniture). A reason to do so, could be the visitor flow, or because of limited space around the furniture.
If you do integrate them into your furniture, please make sure not to place them flat (with a table design) or underneath the last row with Dockingstations (with a wall design).
Other important information about placing your (Start) IDentifiers can be found here.
Casing of the Identifiers
If you prefer to place the Identifiers in a casing, please keep in mind that our Identifiers are equipped with Bluetooth functionality. The Bluetooth signal cannot be transmitted through metal. This means that Identifiers cannot be placed in a metal casing.
Furniture examples
It’s helpful to keep this specsheet at the front desk or somewhere near the Podcatchers, so your staff can see how to handout and take in the Podcatchers.
Spectsheet_Podcatcher handout and intake
Gently wipe them with a slightly moist soft cloth with a regular all-purpose household cleaning product, or use a disposable all- purpose cleaning tissue. Please keep water temperature below 60 °C to prevent degradation of the Podcatcher plastic.
We suggest to use normal (all-purpose) cleaning products, or specific types of alcohol wipes to clean the Podcatcher:
- Soap
- Ajax cleaner
- Detergents
- Isopropyl Alcohol (IPA) wipes
- Ethyl Alcohol wipes (Ethanol, with concentration up to 96%)
Make sure not to use acetone or ammonia based cleaning products, or to expose the Podcatcher to strong bases or acids.
You can wash them in the washing machine in a laundry bag at maximum of 60 degrees Celsius. We advise to tie the lanyards together (25 pieces per bundle) so they will not get tangled.
If it is not possible to read the IDentifier code from the sticker on the back (for example because it is mounted on the wall), you can read the IDentifier code with a Podcatcher.
To do this take the following steps;
- While the Podcatcher is still in the Dockingstation, press and hold the two left buttons (A/B) with both thumbs and take the Podcatcher out of the Dockingstation.
- When all three LEDs are solid, release the buttons.
- Now aim the Podcatcher at the IDentifier(s) and the Podcatcher will tell you the IDentifier code
This also works to read the dipswitch codes for AV-Sync Boxes.
Check if the IDentifier code is added to your stop, if so, is the tour published and synchronized? If so, the batteries of the IDentifier might be empty. You can change the batteries (coin cells # 2032) yourself see this page
You can mount the IDentifier with screws using the ears at the sides of the IDentifier or using double sided tape. Note; the ears can also be removed by breaking them from front to back.
Object IDentifiers
The minimum distance you have to keep in between 2 IDentifiers is 30 cm. The best height is 130 cm from the ground, this way they are easy to trigger for each person (tall/small/kids/visitors in a wheel chair etc.) The best way to mount them is horizontal against the wall / cabinet or post.
Outdoor; make sure the label is attached correct and firm and that the IDentifier is positioned upright (90 degree angle). Also, make sure water can flow away from the IDentifiers during/after rainfall
Indoor; When mounted flat on a table, they are not easy to trigger because of the angle. If you would like to mount them on a flat service always make sure to tilt them towards the visitor, preferably in a 45 degree angle
The IDentifier is able to trigger a Podcatcher within 30 cm on average.
If you would like to cover an IDentifier behind glass or in a casing, make sure to always test this first. Keep in mind that thick glass can limit the IR and Bluetooth signal coming from the IDentifier. A metal casing disturbes strongly.
Start IDentifiers
The minimum distance you have to keep in between is 30 cm. With multiple languages it’s best to hang them staggered diagonal from each other so the visitor does not accidentally activate another language when bringing the Podcatcher to his/her ear.
If you only have a limited space to place them, not enough room to place all your language IDentifiers, you can contact our helpdesk so we can make a change in the settings, which makes it possible to place them closer together.
There is a maximum of 1.9 GB. You can find more information about the Podcatcher in the Specsheet Podcatcher