The Podcatcher Portal allows you to manage your audio tours in-depth, see how your visitors use them, synchronize your Podcatchers remotely, and so on. If you’re working with the Portal and ever feel lost, remember that the help icon (![]() ) at the top-right will open up the documentation for that page.
) at the top-right will open up the documentation for that page.
Once you feel comfortable enough to dive in and make a Tour you can have a look at the page Creating a tour – getting started.
The home page
After you’ve logged in, you will be presented with the home page of the Podcatcher Portal. Here you can see at-a-glance how your site is doing.
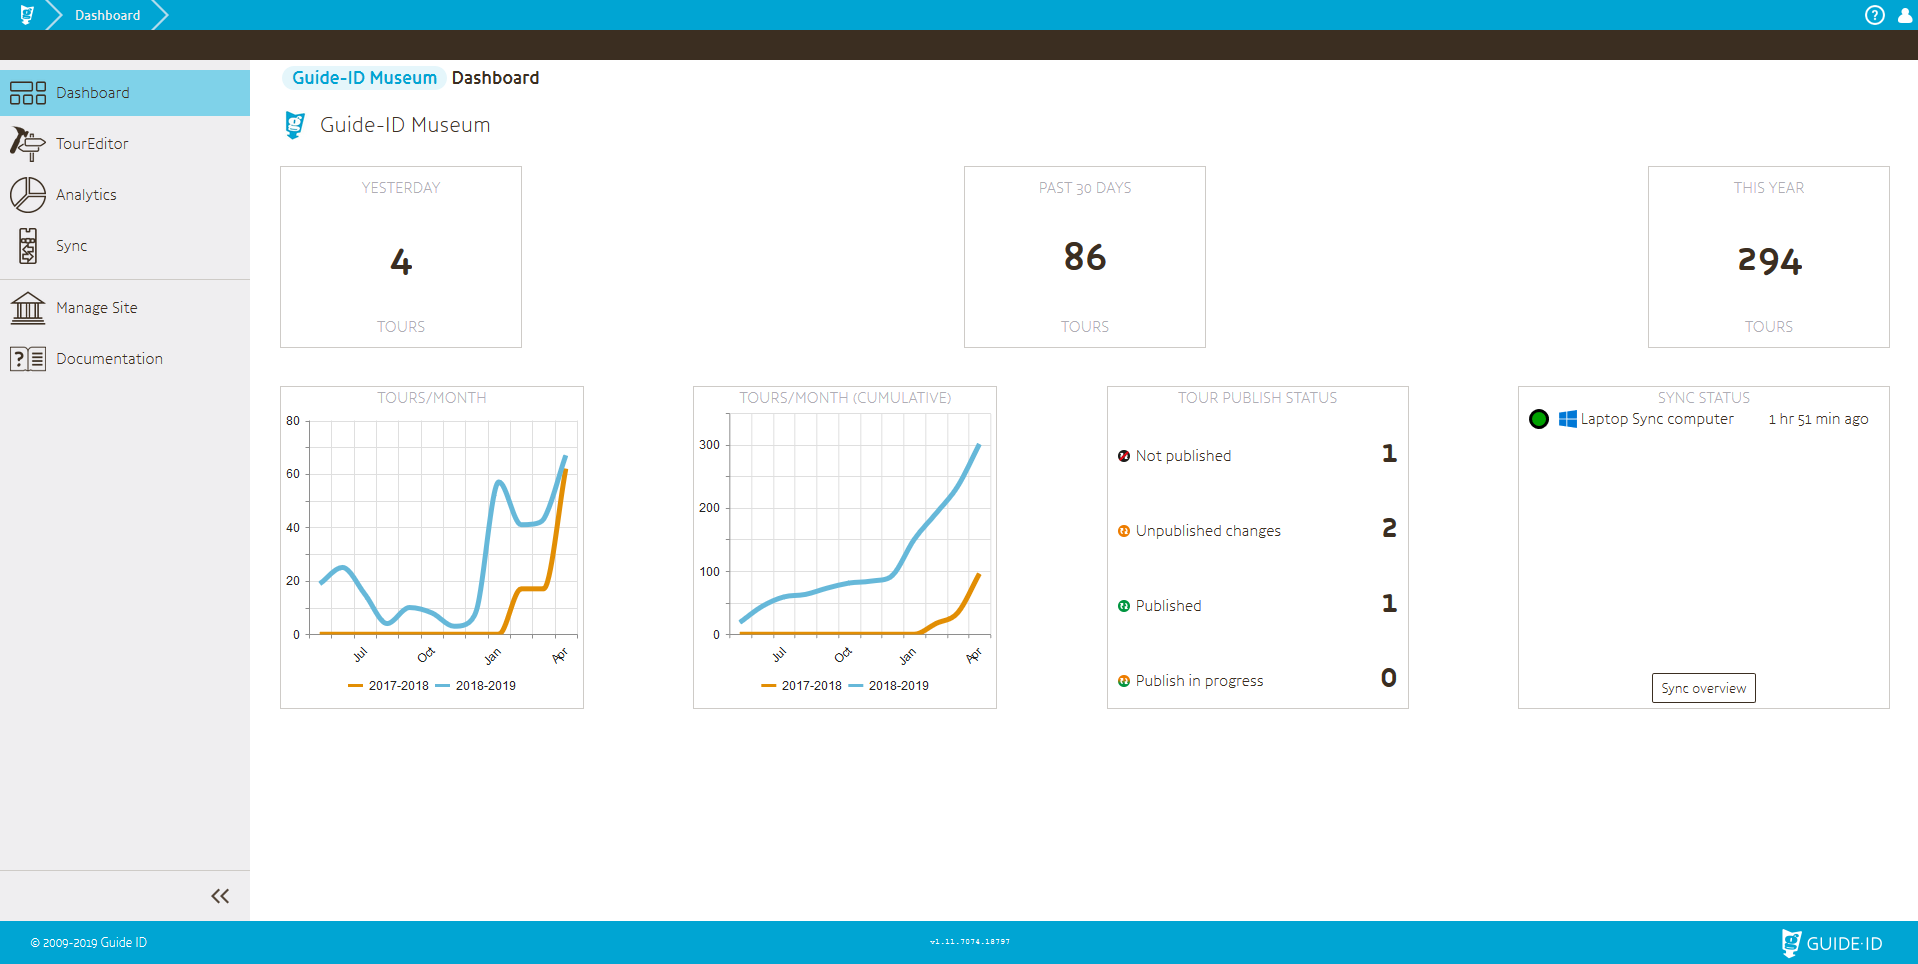
The dashboard contains a summary of how many visitors your site has had in the past day, month and this year in the numbers. Further, the graphs represent how many visitors experienced a tour compared to last year. The ‘Tour publish status’ table shows how many tours may need publishing, to make sure Podcatchers are guaranteed to have all the latest content. Lastly, the ‘Sync status’ is a summary of what your Sync Consoles are up to.
On the left-hand side throughout the Portal, the sidebar allows quick navigation through the different parts of the application:
TourEditor: Create, update, and manage your audio tours and their content.
Analytics: Analyze the data the Podcatchers have sent back as part of their synchronization.
Sync: Schedule synchronization moments, review sync status reports, and manage sync console settings.
Manage Site: Manage your Site’s information, such as contact details and who is allowed to change or view things in the other parts of the Portal.
Documentation: Refers to this knowledgebase.
Should an icon be greyed out for you, this means it’s not been made available to you by your Site administrator. Contact them if you think this is in error.
You can collapse (or expand) the sidebar at any time by clicking the ‘<<‘ button at the bottom of it.
Introduction to the screen layout
The Podcatcher Portal has its layout built so that it’s consistent across the website. Here we’ll explain what the most important features are and how we recommend you use them.

Breadcrumbs
At the very top of every page is a strip of blue background with white arrows, text, and a few icons at the very end.
The Guide ID logo always takes you back to the home screen if you click on it.
The bit of the bar to the right of the logo – which is called the “breadcrumb trail” – represents the trail or path you can take to go back to the start of the application.
At the very right there are two more icons: click the question mark to open the Help popup (which opens this knowledgebase’s relevant article for that page), and the pawn icon to show the Account popup where you can change your account details or password, and log out of the Portal.
Tabs
Just below the breadcrumb trail are the Tabs. These buttons shows you which part you’re editing. For example, Sites have a General Tab, a Language & Content Tab, an Images Tab, a Tab for the Podcatcher settings, and lastly a Tab to manage the users on the Site. Each Tab has different things to add, edit or view. If you’re ever unsure about what the current Tab is for, simply click the question mark icon in the top-right of the page.
Page title
Below the Tabs is a concise indication of where in the application you’re working. The arrow on the left will take you ‘up’ one ‘level’; from a Stop to the Stop list in that Tour and so on.
Saving changes
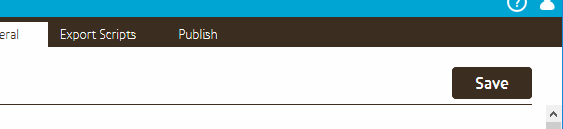
Whenever you change something in a form, the [ Save ] button will pop up at the top right of the screen. Clicking it will save the changes to the server.