A Tour consists of one or more Stops, which in turn have Clips. Accessing this ‘section’ of the TourEditor is done through the TourEditor – start screen or by navigating back to it from Stops or Clips. A Tour has the following screens:
Tab – Stops
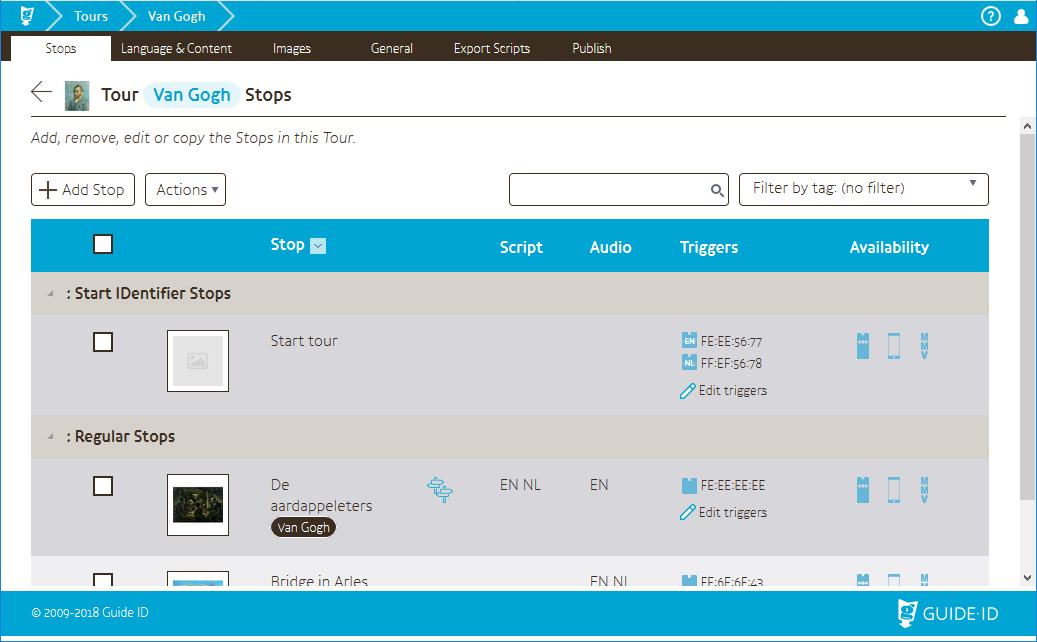
The Stop list is the main page of a Tour, this list shows all of the Stops in the Tour. Similar to the list of Tours, clicking on a row in a particular location will take you to the relevant part of that Stop, so clicking on the image will take you to the image part of that Stop.
Just above the list on the right-hand side are the Search (left) and Tag filter (right) boxes. Typing a search term here – for example, “Van Gogh” – and pressing the Enter button will search the Stop names for it and show only those. Similarly, selecting an option in the drop down menu of the Tag filters will only show the Stops that have that Tag attached to them.
The list shows the following properties for each Stop:
Stop title: The internal name of this Stop. This name is also used in Analytics for Stop-based queries.
Script: Every language that has script content in this Stop will show up here.
Audio: Every language that has audio content in this Stop will show up here.
Triggers: The Triggers linked to this Stop.
![]() Availability: Which publish destinations this Stop will be published to. There is one icon for each, and it can have one of three ‘states’:
Availability: Which publish destinations this Stop will be published to. There is one icon for each, and it can have one of three ‘states’:
- If the icon is blue, that means it will be published and available on that platform the next time you publish.
- If the icon grey, it means that the Stop won’t be published to that platform (or removed if it was previously available).
- If the icon is part blue with a warning icon, the Stop is set to be published to the given platform but the Tour is not. Consequently, it will not be published to the platform. If you want it to make it available you have to check the box in the General tab of the tour.
Add Stop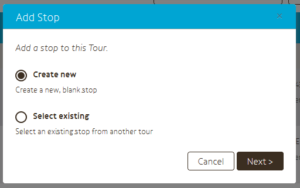
Create New: Create blank new stop.
Select Existing: Re-use an existing stop from another tour of your site. When you select this option, the Stop will be shared with both the original tour and the current one (as well as any others it may be linked to). This means that changes to the Stop will affect both Tours. Only the availability and the triggers are not shared; those are copied (so editing those properties won’t affect the others). All of the content is shared, however.
Note; If you want to use a Stop form another tour, but do not want changes to affect the Stop in the other Tour, then use the action Copy (see below)
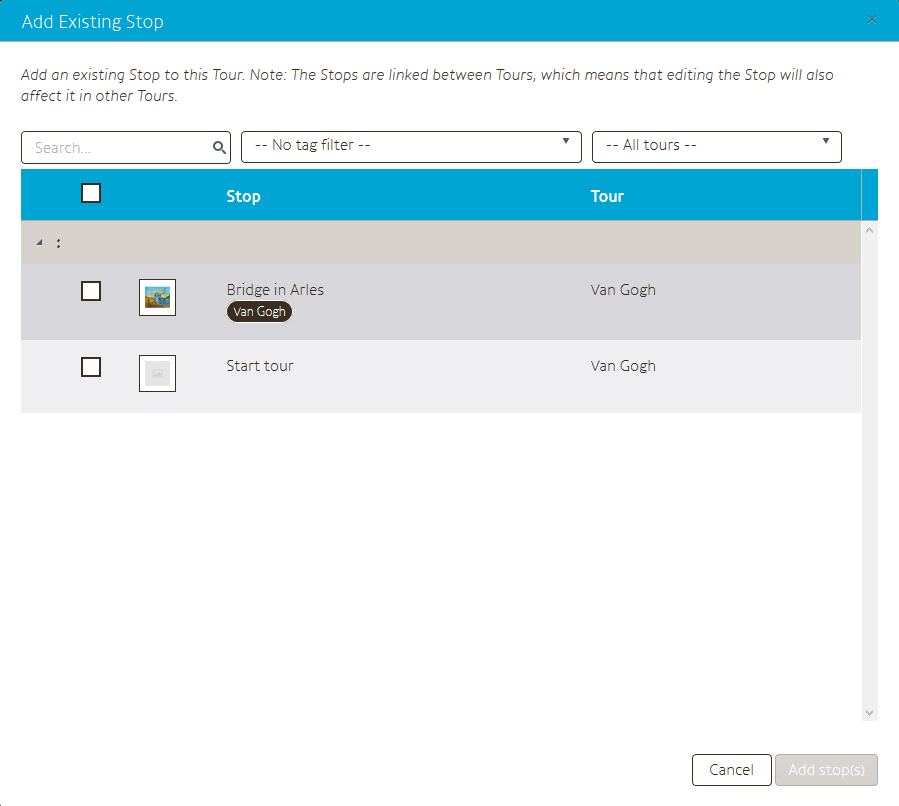
When you choose for “Select existing” you get a pop-up like this. You can see here stops of other tours including archived tours. You can search on title or filter on Tag/ Tour.
For more reading about Tags see here.
Actions
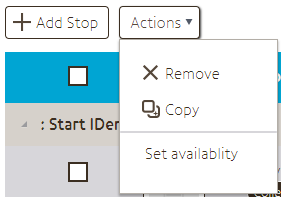
Remove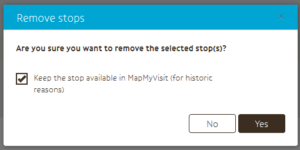
Remove the Stop from this Tour. If this Stop is available for MapMyVisit it is good practice to check the “Keep the stop …”
If the Stop was used in multiple Tours, the Stop will stay available in the other Tours.
Copy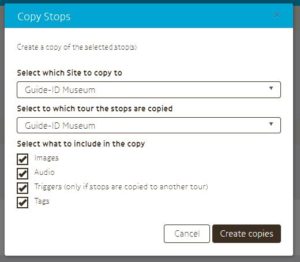
Copy stop(s) to a Tour. This can be the same Tour or a different one.
Include images: Also copy the Stop’s images.
Include audio: Also copy the Stop’s audio.
Include triggers: Also copy the Stop’s triggers. If this would cause conflicts, copying is skipped for that particular trigger.
Include tags: Also copy the Stop’s Tags.
Set Availability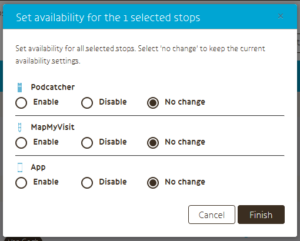
Enable: set the availability to enabled for all selected Stops.
Disable: set the availability to disabled for all selected Stops.
No change: Leave this availability unchanged for all selected Stops.
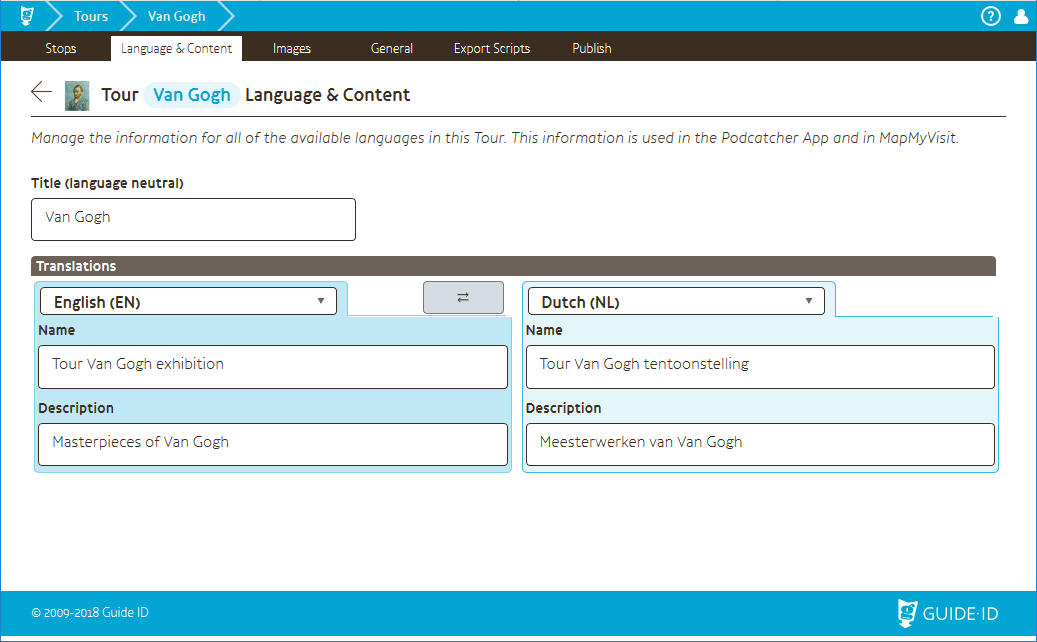
Tab – Language & Content
Title (language neutral): The title of the Tour is used in the Tours list and in Analytics. It is also a fallback description for missing translated names for this tour for MapMyVisit and the Podcatcher App.
These translations are not relevant for Podcatcher-only Tours. Only the Podcatcher App and MapMyVisit use this information.
Translations
 Language: You can select one of the languages available for the Tour in this drop-down menu. If there are two or more languages available, you will see two languages side-by-side.
Name: Translated name of tour. If left empty, the language neutral title is used.
Description: Description presented with this Tour in App and on MapMyVisit.
Tab – Images
On this page you can upload an image that will be shown in the Podcatcher App.
Any square image larger than 300 x 300 pixels will do.
Tab – General
On this page you can configure some general settings for the Tour.
- Select on which platforms the tour should be available
- Select the languages in which the tour should be available Pick the tour languages here
- Fallback languages: Should (Stop) content not be available in the language the Tour is being experienced in, the Podcatcher will ‘fall back’ to another language.

Tab – Export Scripts
This page serves as a tool to quickly export all script text to a file (or print it), for use by an audio recording studio.
First, select a language to export, then decide whether you only want to export the text for Clips that don’t yet have audio uploaded, and click [ Export script ].
Next, review the script that appears and click the [ Print script ] button. This will open up your browser’s print document dialog.
To save it as a PDF file, change the printer (“destination” in Google Chrome, “printer name” in Mozilla Firefox) to “save as PDF” or “Microsoft Print to PDF” – either works. Click ‘OK’ or ‘Print’ until the printer would normally start doing its thing and you’ll instead see a ‘save file’ dialog from your browser. Save it somewhere you can find it again and click ‘Save’. Now you can simply e-mail it to the audio recording studio; the instructions should be simple enough for them to deliver the files in the requested format.
Refer to this article on how to import the studio’s audiofiles in bulk.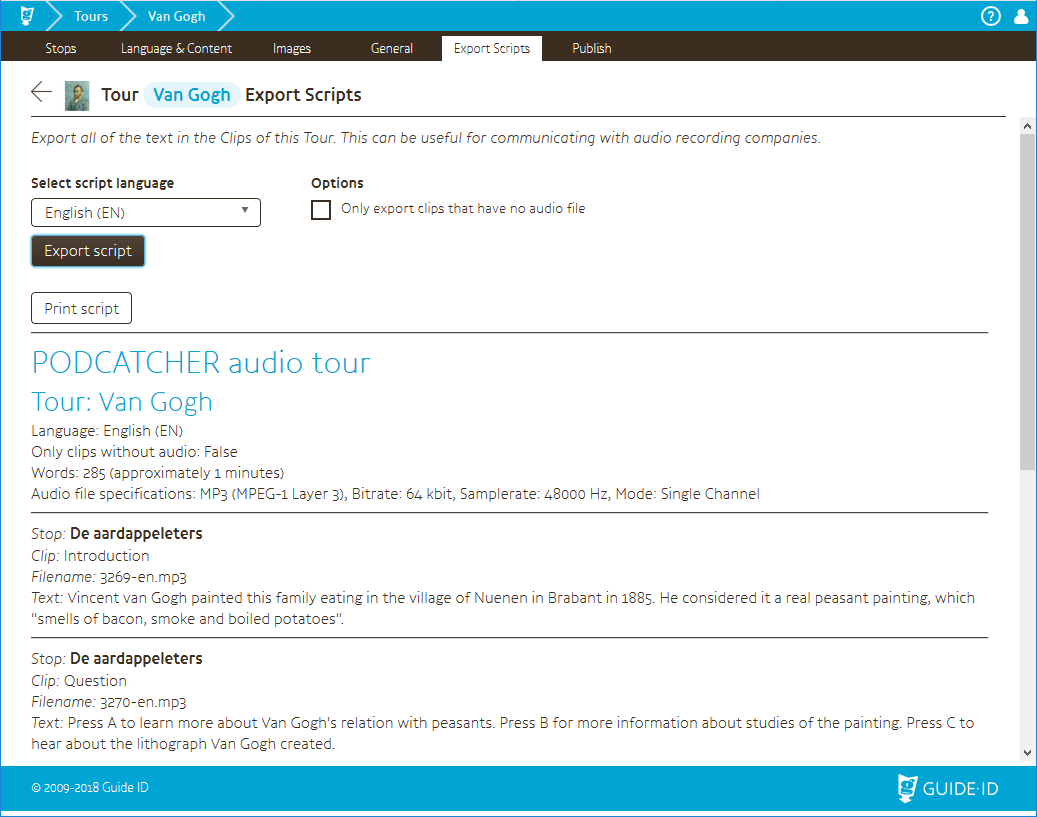
Tab – Publish
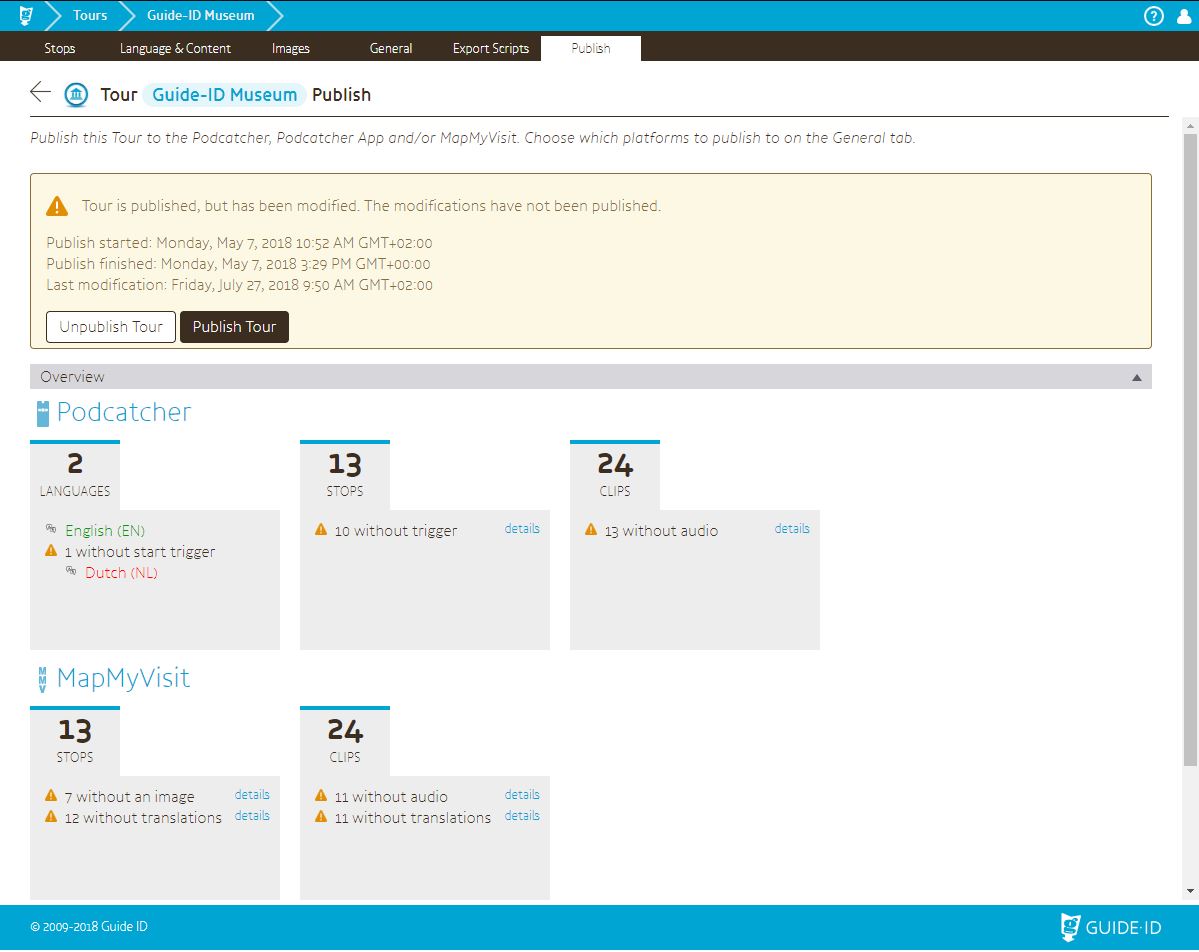
The Publish screen is where you can make the Tour you’ve made, available to the Podcatcher, Podcatcher App and/or MapMyVisit.
The screen changes slightly depending on the publish status, that is whether the Tour has or has not been published, is in the process of being published, or has been published but has unpublished changes.
At the top is the publish status bar, informing you whether the Tour has been published.
Below that is the publish overview, which will warn you should there be any missing content for a given publish destination. Clicking the ‘details’ button on any of them will present you with a list of items that are missing content in one form or other.
Publish Tour: Prepared the Tour as configured in the TourEditor for active publish destinations
Unpublish Tour: Make this Tour unavailable for all destinations. If this Tour is outdated, it is easier to archive the Tour instead of unpublishing.
At the very bottom of the page you can find a collapsible section that shows you when content was published to which platform. This is the same information as presented at the top, but in more detail.