Syncconsole Specificaties

Introductie

Om de inhoud en gebruiksgegevens van de Podcatchers te synchroniseren, moet een PC worden opgezet als een Syncconsole, bij de hand-out desk die is aangesloten op de Dockingstations en het internet. Wij leveren deze PC aan u maar als u een extra Syncconsole wilt installeren (bijvoorbeeld op kantoor of bij een partner) kunt u  onze synchronisatiesoftware installeren op een gewone PC. Hieronder vindt u de specificaties waaraan een Syncconsole moet voldoen om goed te kunnen werken.

Specificaties

De computer die als Syncconsole wordt ingesteld, moet aan de volgende specificaties voldoen (of deze overtreffen):

  • Elke nieuwe PC die je in een winkel vindt is meer dan waarschijnlijk goed genoeg.
  • Operating System: Windows 10 (32- or 64-bit), Windows 11 (32 or 64 bit).
  • We raden aan een (mini)computer of laptop te kopen die nog steeds USB 2 aansluitingen heeft om de USB HUB's of Docking Stations op aan te sluiten, we hebben problemen gezien met USB 3 connectoren (meestal zijn de USB 2 connectoren in een computer zwart en de USB 3 connectoren zijn blauw).
  • Do not connect more than 20 Docking Stations (or 200 Podcatchers) to a single sync PC.
    • Wanneer u USB-hubs gebruikt, sluit u de Docks aan alleen naar de hubs, en de hubs alleen naar de computer. Sluit geen hub aan op andere hubs, want daar hebben we in het verleden veel moeite mee gehad. Als u besluit dit toch te doen, a.u.b. Vermeld dit wanneer u contact met ons opneemt voor ondersteuning bij synchronisatieproblemen.
  • De PC moet een bekabelde internetverbinding hebben, alleen wifi is onvoldoende.
  • Intern geheugen (RAM): Minstens 512 MB.
  • Opslagruimte (harde schijf): Minstens 1 GB. Het wordt sterk aanbevolen om een veel grotere marge te nemen in de hoeveelheid vrije ruimte; bij voorkeur meer dan 100GB om Windows in staat te stellen om lang door te gaan met het installeren van updates.
  • USB-aansluiting: Ten minste 1 vrije USB 1.1-poort; normaal gesproken heeft u 10 Docks aangesloten op een USB-hub, dus de werkelijke hoeveelheid hangt af van het aantal Dockingstations dat u heeft voor een bepaalde Sync Console. Vergeet niet het totale aantal docks dat op een enkele computer is aangesloten te beperken tot 30.
  • De PC moet (automatisch) worden geüpdatet met de laatste Windows-updates (met behulp van Windows Update).
  • De PC moet 24 uur per dag/7 dagen per week worden ingeschakeld.
  • De PC moet 24 uur per dag en 7 dagen per week op het internet worden aangesloten.
  • De PC en de aangesloten Dockingstations moeten 24 uur per dag en 7 dagen per week op de stroom worden aangesloten.
  • U moet 'Administrator'-rechten hebben om de synchronisatiesoftware te kunnen installeren.
  • Belangrijk voor de IT-afdeling; de Syncconsole moet via de website apps.podcatcher.eu op Port 80 verbinding kunnen maken met onze server.

Opmerking: De Podcatcher Sync-software ondersteunt geen directe verbindingen met het internet via een proxyserver! Er is een workaround voor dit, zie de geavanceerde configuratiepagina voor meer informatie.

Opmerking: Het Podcatcher Sync programma draait niet onder Linux of MacOS.

Opmerking: Gebruik nooit (!) USB-verlengkabels, alleen onze meegeleverde USB-kabels (ongeveer 1,80m/6ft lang). Als u meer lengte nodig heeft, plaats dan de Syncconsole dichterbij of verplaats de Dockingstations. U kunt de USB-kabels niet verlengen zonder dat er ernstige synchronisatieproblemen optreden die zeer moeilijk te diagnosticeren zijn en onoplosbaar zijn voor de helpdesk.
Syncconsole-installatie

Introductie

To synchronize content and usage data of the Podcatchers, a PC needs to be setup as a Sync Console near/at the handout desk which is connected to the Dockingstations and Internet. We will provide this PC to you, but if you need  an extra Sync Console installed (for instance in the office or at a partner) or if you have to re-install your own PC, you can  set up an a regular PC following the steps below. Note: any computer used as a Sync Console must meet deze specificaties.

Installatie

Before a computer can sync Podcatchers, it will need some software so it ‘knows’ how to work with the Guide ID servers and devices. There’s TeamViewer (1)  that lets you (and us) connect to the computer remotely (should it be necessary) and the Sync desktop application (2). Afterwards, you’ll need to associate the desktop app’s serial number with your Site (3) so the computer can synchronize your content.

Attentieif you have not yet received the Docking Stations, you can start the installation steps but you will not be able to complete step 3 because the activation code is not shown and/or the Sync program will say that the Sync service is not running. This is due to a limitation of the Windows driver model. Once you have connected the Docking station(s) and reboot the computer, the activation code will be displayed.

1. Guide-ID TeamViewer

Om ons in staat te stellen u op afstand te helpen, heeft u de mogelijkheid om het TeamViewer Host programma te installeren. Guide-ID kan dit programma gebruiken om u te helpen, indien er problemen zijn tijdens de installatie van het synchronisatie programma of op een ander moment in het proces. Het installeren van dit programma is optioneel, maar wij raden het aan.

Opmerking; Wij raden altijd aan om de Sycconsole op uw 'gast netwerk' aan te sluiten zodat uw interne netwerk te allen tijde beveiligd is. Uw systeembeheerder zal dit voor u kunnen doen aangezien het hun verantwoordelijkheid is.  

  1. Download het programma 'TeamViewer_Host_Setup.exe‘.
  2. Zoek het bestand in uw downloads map, klik er met de rechtermuisknop op en kies Voer uit als Beheerder. Neem contact op met uw computer/netwerkbeheerder om deze rechten te verkrijgen als u ze niet hebt.
  3. Klik op het eerste scherm op Volgende .
  4. U wordt gevraagd hoe u het programma wilt gebruiken, kies dan zakelijk/commercieel en klik op 'Volgende'.
  5. De licentieovereenkomst zal worden getoond, accepteer de overeenkomst en klik op 'Volgende'.
  6. U wordt gevraagd om een wachtwoord te kiezen, gebruik het woord Podcatcher en vul een computernaam in, bijvoorbeeld de naam van uw organisatie. If you have multiple Sync Consoles, we recommend naming them something descriptive like “Front desk” or “Podcatcher hand-out temporary tour” along with the name. You don’t have to tick the box for ‘add this computer to my list of computers’. Click ‘Next’.
  7. Klik op Afwerken om de installatie te voltooien.
  8. Na installatie een scherm met Uw ID zal worden getoond. Stuur een e-mail naar helpdesk@guideid.com met dit nummer en een beschrijving van uw computer (waar deze zich bijvoorbeeld bevindt).

2. Installation of the Podcatcher Sync application (Sync Console 2.x)

The Sync Console 2.x application is a Windows service that allows Podcatcher V3 hardware to sync with the PP4 Platform. It replaces the legacy Podcatcher Sync service.

The new service can be installed on Windows 10 or 11. If the legacy Podcatcher Sync is already installed, it will be automatically replaced.

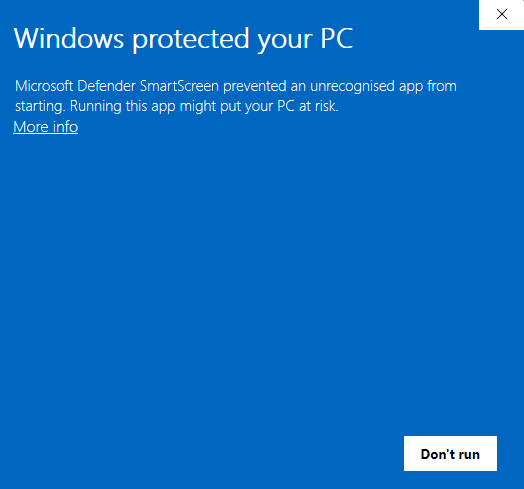
  1. Download the msi installer from GuideID.SyncSetup en run it. Depending on your security configuration, a message similar to this may appear:


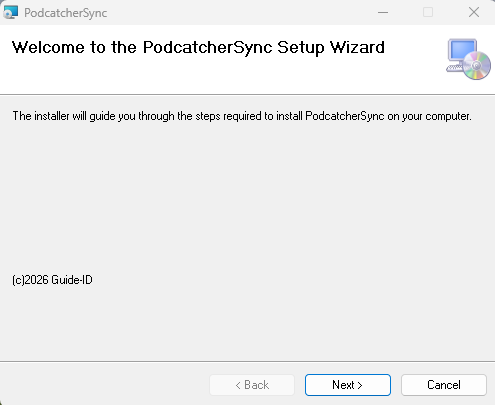
  2. If the “Run anyway” button is already visible, click it. Else you need to click “More info” first and then click “Run anyway”. You will be greeted by the following screen:


    Click “Volgende” to continue.

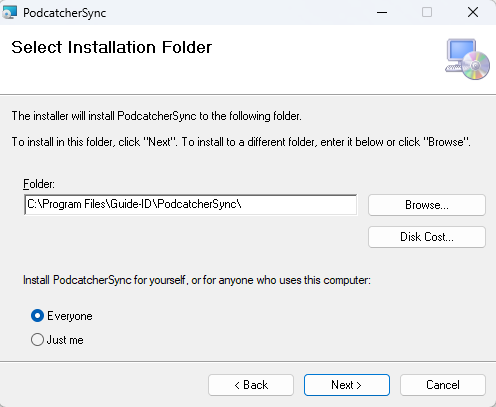
  3. Select where to install the application. It is recommended to accept the default location. (Let op: the contents of all Podcatcher audio tours will be stored here as well, so make sure there is enough space available.)

    Make sure to select “Everyone” and click “Next”:


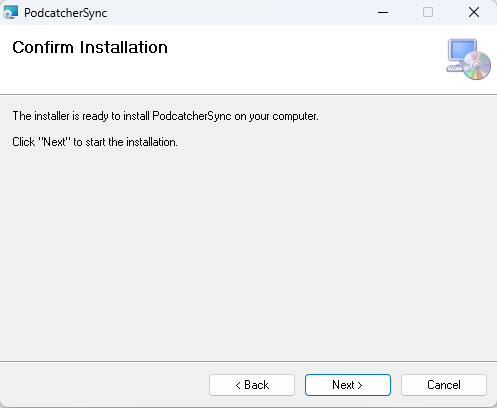
  4. Klik op “Next”:


    Klik op “Next”:


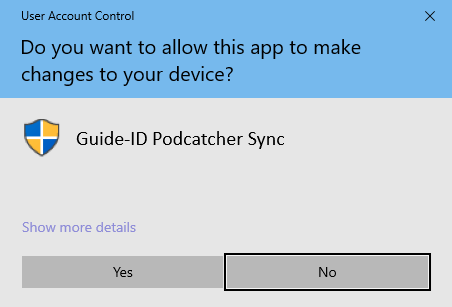
  5. A warning similar to the one above may appear asking permission to make changes to your device. Click “Yes” of “Allow” or something equivalent to continue installation.


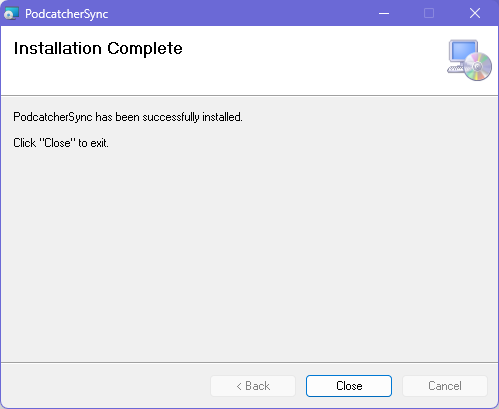
    After the application has been installed, click Close.

Identifying the Serial Number and Authentication Key

If the Sync Console still needs to be registered in the Podcatcher Platform, you need to provide a serial number and authentication key.

This information can be retrieved by running the following command from an elevated command prompt (run cmd as administrator):

GuideID.PodcatcherV3Sync.exe -cmd info

The following information appears.

Guide-ID Podcatcher Sync Service version: 2.1.0.0
Sync Console Serial number: scXXXXXXXXXX
Authentication key: XXXXX-XXXXX-XXXXX-XXXXX-XXXXX

Take note of the Sync Console Serial number and the Authentication key and enter them in the Platform when registering your Sync Console.

3. Register your Sync Console

  1. Ga naar de Podcatcher-platform en login using your Podcatcher Platform account.
  2. Klik op ‘Hardware → Syncaan de linkerkant van de pagina.
  3. Klik op de [ + Add new Sync Device ] button to register a Sync Console and to link it to your site.
  4. A popup window should appear with the following input fields:
    1.  Selecteer eerst de Sync Console optie en klik op Volgende.
    2. Syncconsole Serial Number en Authenticatiesleutel, this is where you fill in the serial number and authentication key that you copied/wrote down from the previous step.
    3. Syncconsole Daily sync time, this is where you select a time when all Podcatchers should be present in the Sync Console, usually after opening hours.
    4. Syncconsole BeschrijvingHier vult u een naam in voor de Sync Console, bijvoorbeeld 'Distributiepunt hoofdbureau'.
  5. Add the Sync Console by clicking Finish button. The list of Sync Consoles should update and the new one appears.

Als u meerdere locaties hebt waar Podcatchers van inhoud moeten worden voorzien, kunt u de hierboven genoemde stappen op elke locatie opnieuw uitvoeren met elke computer die voldoet aan de specificaties van de Syncconsole. Elke installatie heeft zijn eigen unieke activeringscode die u kunt gebruiken om de locatie te activeren en te kunnen zien in de Portal.

Mocht u problemen ondervinden bij het installeren van de Podcatcher Sync-toepassing, probeer dan het Sync Console installatie problemen oplossen pagina.