Understanding AV-Sync
AV-Sync is an innovative feature that enhances the way audiences enjoy multimedia presentations. With AV-Sync, audio content is perfectly synchronized with video content. This means an unlimited amount of visitors can watch a video displayed on a screen and listen to the corresponding audio track on a Podcatcher, all in real-time and in their preferred language.
By offering multiple language accommodation, AV-Sync ensures that every visitor, regardless of their language preference, can have a fully immersive, personalized, and synchronized audiovisual experience.
Enabling AV-Sync
This guide walks you through the process of setting up AV-Sync, ensuring compatibility, preparing and testing your files, and conducting a flawless tour. What we will achieve is extracting the existing audio track from the video and replacing it with a time code. The original audio track will be transferred to the Podcatchers, allowing visitors to listen in real-time. Don’t worry, the original video will stay intact.
Step 1: Preparing the Movie File
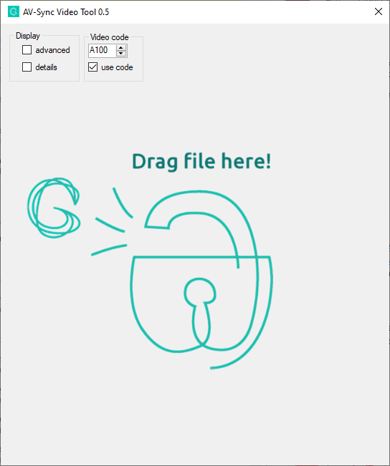
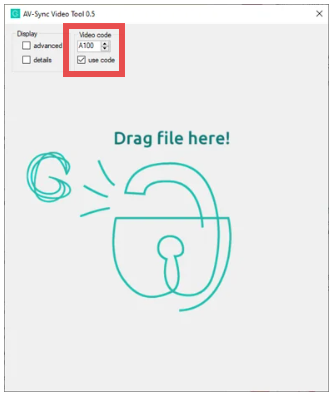
Use the Guide-ID AV-Sync Tool to process your original movie file. Assign a unique Video Code to each movie file – starting with “A1”. Make sure that the ‘Use Code’ check box is checked. The tool generates two files: one for video playback on the media player and an audio file to be uploaded to the Guide-ID Portal.
Both files will be exported to your computer next to the original video. The audio file ends with “_audio” the video with the added timecode end with “_video”.
You can download the AV-Sync video tool here:
https://pguideidweust.blob.core.windows.net/downloads/AV-Sync-Video-Tool-0.5.exe
Step 2: Adding the Audio File to the Portal
Log into the Guide-ID Platform, and create a new AV-Sync stop. Upload the audio file generated by the AV-Sync Tool. If you have alternate languages for the tour, upload these audio files as well. They should have the same length as the original audio.
Enter the Video Code you’ve chosen in the tool in the Video Code box. Also add an IDentifier that visitors can scan.
Step 3: Test the Video Playback
- Begin playing the video on the media player to ensure it is displayed correctly on the screen.
- You will note a beeping sound, don’t worry. This beep is translated by the Brainbox to a time code.
- Make sure that the volume on the media player is unmuted and set to an appropriate level, ensuring it is neither too quiet nor too loud.
- Setting the volume to 30 or 40 % is mostly perfect.
Step 4: Brainbox Setup
Now, connect the supplied cables:
- Use a 3.5mm Jack cable to connect the media player (or TV) to the Brainbox.
- Use the IR Out connector to connect the RCA cable to the supplied AV-Sync IDentifier with the Brainbox
- Connect the USB-C cable to the power adapter or use a USB-A port on the media player.
- Both the led’s (WiFi and AV-Sync) blink Orange once.
- Press the small switch button on the Brainbox.
- The AV-Sync LED will turn orange. Indicating Auto Gain has started where the Brainbox is searching for the best setting. The LED light will flash green within around 15 seconds; all done.
Step 5: Test the Tour
Lastly, ensure that your tour is published and synced on the Guide-ID Platform. Test the tour’s audio by playing the AV-Sync stop on the Podcatcher or holding your phone close to the IDentifier if using an app. Point the Podcatcher or phone at the AV-Sync IDentifier and ensure the expected audio starts playing, indicating a successful setup.
Following these steps will provide a seamless and enjoyable tour experience for your audience, further enhanced with the power of synchronized multimedia delivered by AV-Sync.
Understanding the LED Indicators on Your Brainbox
Make sure the Brainbox is connected to a mediaplayer with a running video
| color AV-Sync LED | Meaning |
|---|---|
| Green blinking | the AV-Sync signal is functioning correctly, ensuring perfect audio-video synchronization. |
| Orange (1 short blink) | The Brainbox is powered on. |
| Orange | Auto gain is in progress. It’s fine-tuning the settings for optimal audio synchronization. it’s started and stopped by pressing the switch button. If it takes more than 15 seconds you need to check the audio volume of the media player. Make sure it’s unmuted and not too quiet. |
| Red blinking | The Brainbox is receiving an audio input, but it’s not the correct AV-Sync track. Test the audio output of the media player with headphones or speakers to check if you can hear the AV-Sync track (beeping noises at regular intervals).If you don’t hear the beeps, the AV-Sync track isn’t added to the video or the audio output isn’t selected on the player. Alternatively, the audio track was added to the left channel.Alternative, adjust the volume by lowering is 20 %. restart the auto gain by pressing the switch button. |
| off | No audio signal is being processed. Verify the volume on the media player. Note, when plugging in the USB-C cable it wil blink orange once indicating it’s powered. |
Remember, the Brainbox doesn’t need a Wi-Fi connection to work; it just needs power (through a USB-C 5V adapter) and the correct audio signal from a media player. With AV-Sync, your visitors can enjoy videos in perfect harmony with audio, in real-time and in any language. Setting up your Brainbox is the first step to offering an immersive and synchronized audiovisual experience!