Introduction to the Clip flow editor
While a Stop is a place in the Site – usually near a piece of art in a museum, but can also be a room or an explanation for visitors – a Clip (or set of Clips) is the content that gets played when a Stop is triggered. This page gives you full control over how Clips flow into one another.
Note: If your Stop should just play one Clip, then you can skip most of the explanation and just use the [ Edit Clip ] button to add content.
Working with the Clip flow editor
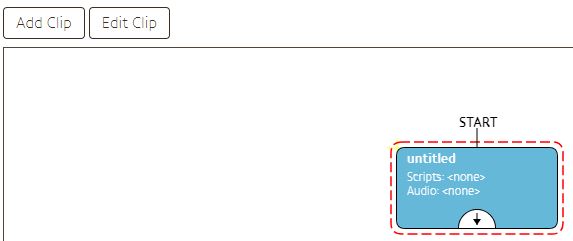
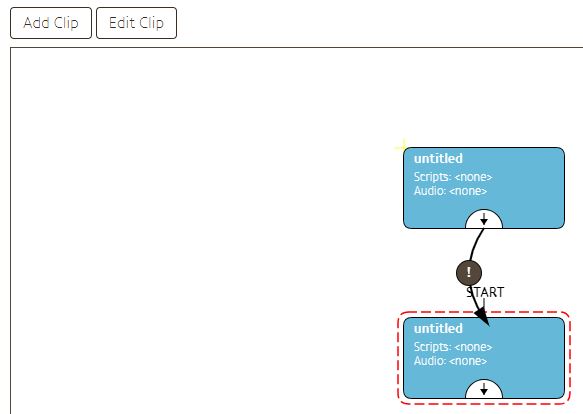
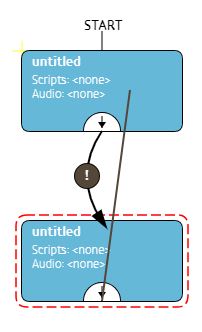
 Start Clip
A Stop will always have at least one Clip. When you make a new Stop, a new Clip (named ‘untitled’) is added to it and is marked the Start Clip. As the name implies, this is where the Stop will start playing content when it is triggered.
Editing Clips
Having an empty Clip is all well and good, but it exists so it can play content. While having a Clip selected – the selected Clip is marked by the dotted line around it – click the [ Edit Clip ] button. This will take you to the Clip – Language & Content screen, where you can add content. Double-clicking the Clip works as well.
Adding Clips
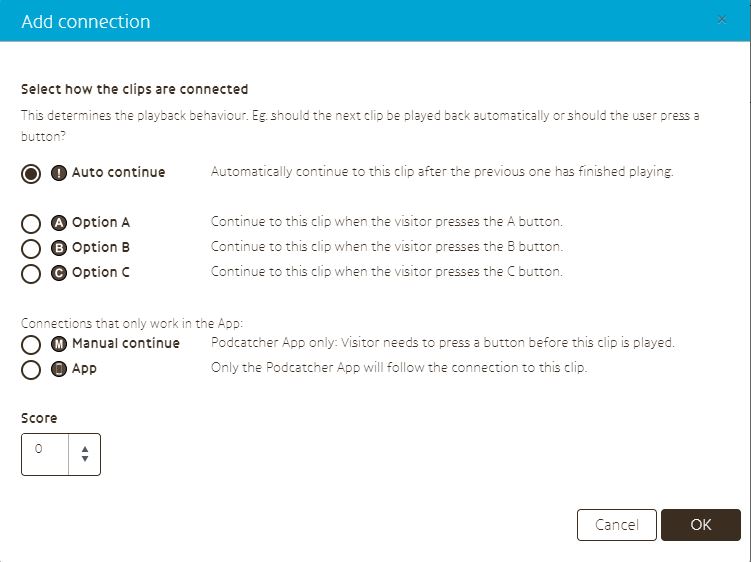
Next to the Edit Clip button is the [ Add Clip ] button, which adds a Clip connected to the selected Clip. A menu will pop up with all the options for adding a new Clip. The following fields are present:
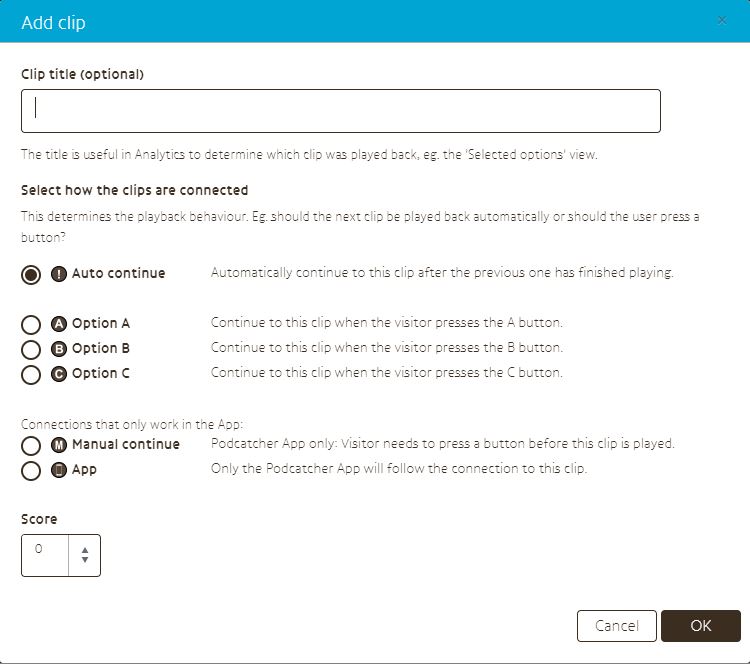
Clip title (optional): While this field is optional, it’s very beneficial to enter something descriptive here. Partly for the convenience and clarity in the Clip flow, but also in Analytics, where the Clip titles are shown for some of the options. It’s impossible to distinguish between all the ‘untitled’s if you don’t give them another name. Regardless, it’s not required.
Select how the clips are connected: This will let the system know when it should proceed to the next Clip. ‘Auto continue’ simply plays the next Clip when the current one has finished playing its content. Options A, B and C allow the visitor to choose between the buttons on the Podcatcher. Lastly, ‘Manual continue’ and ‘App’ only work in the Podcatcher App; ‘Manual continue’ requires a button to be tapped on the smartphone, while ‘App’ is effectively an ‘Auto continue’, but only the App will follow it.
Note: If a certain type of connection is not possible – for example, a second ‘Auto continue’ connection wouldn’t work – you won’t be able to select it.
Score: This isn’t relevant to most Clips, but you can opt to grant the visitor points for this connection. Score can then be used to respond in various ways. As an example, a quiz could grant points to correct answers, which would prompt a “Well done” from a Score IDentifier.
Removing Clips
To remove a Clip, click it and then the [ Remove Clip ] button. If you can’t find the button, you’ve probably selected a Start Clip – which can’t be removed.
Note: All Clip content will also be removed! Then again, this is probably what you’d want if you’re deleting a Clip.
Tip: If you want to temporarily not use a Clip, you can remove the connections to this Clip.
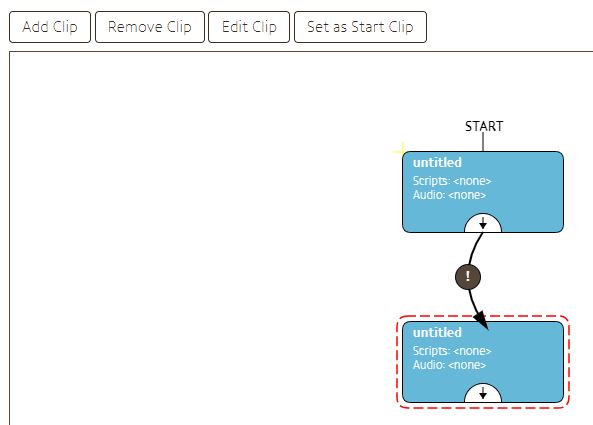
Setting a different Clip as the Start Clip
Similarly to removing a Clip, the button to make a Clip a Start Clip, you have to be selecting a Clip that isn’t already a Start Clip. Click the [ Set as Start Clip ] button to do just that. The Stop will now start from the new Start Clip when triggered.
 Adding Connections
You can add Connections between existing Clips by hovering your cursor over the semicircle in the Clip, clicking and dragging to the next Clip, then releasing the mouse button.
Note: You can also make the Clip refer to itself to make it loop.
Note: It’s entirely possible to make multiple Connections from one Clip to another Clip, even if the other Clip is the same one each time. You can use this to make a “press any button to continue”-style flow.
When you’ve dragged the Connection from one Clip to the other, a dialog will appear. This is effectively the same one as for adding a Clip, just without the new Clip’s title. Refer there for the full explanation of the options.
Editing or removing Connections
You can edit or remove a Connection by clicking it and then clicking either the [ Remove Connection] or the [ Edit Connection ] button, depending on what you want to do with the Connection. If you’ve come this far, removing a Connection shouldn’t be confusing and editing a Connection is pretty straight-forward as well so it shouldn’t give you any trouble.
Simple Clip flows
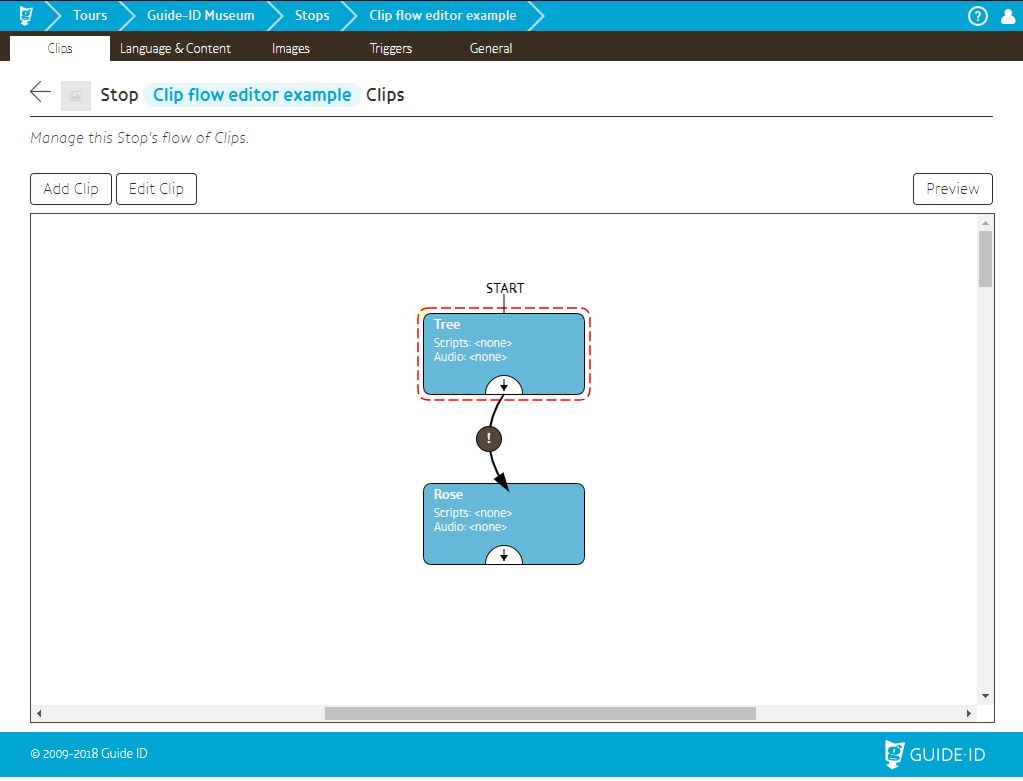
In the example below you can see a simple flow of Clips. When this Stop is triggered, it will start playing at the ‘Tree’ Clip, and when that’s finished, move on to the ‘Rose’ Clip.
Note: You can drag Clips around just like you would icons on your desktop. You can’t do this with Connections, however.
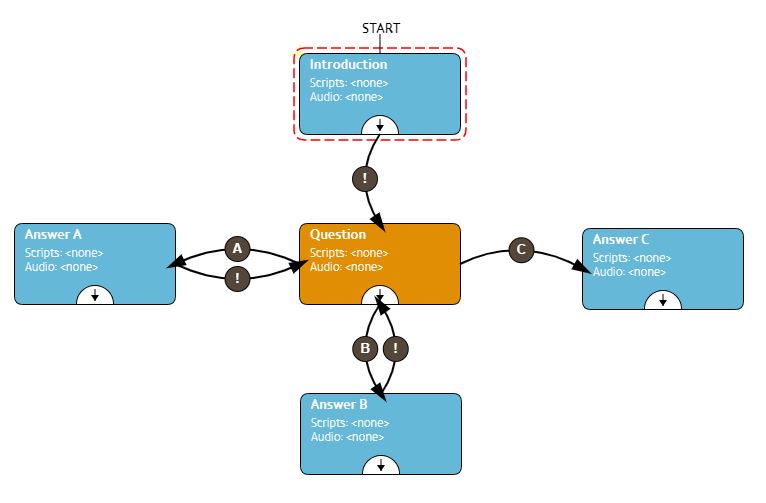
A/B/C choice Clips
To make a quiz-type or “if you’d like to know more about aspect A, press this button, if you’d like to know more about aspect B, press this other button” flow of Clips, using A/B/C choice Clips is an easy way to accomplish this. For this kind of flow, we recommend starting out with an introductory Clip, which connects with an ‘Auto continue’ to the actual question, which then connects to the possible answers with A, B, and/or C connections. This is so the visitor can still adjust the volume on the Podcatcher or pause playback while the audio is playing and no question is being asked.
As an example, below you can find a generic quiz flow. When the Stop is triggered, the introduction will play first, explaining what this Stop is about. It would have content like “The Podcatcher is an amazing device. It was made by the Dwarves, forged from mythril…”. When the introduction Clip’s content finishes, the question will be posed, for exmaple “The first Podcatcher was built which country? Press the ‘A’ button for the United States of America, ‘B’ for Japan, or ‘C’ for the Netherlands”. When option A is chosen, the ‘Opion A’ clip would play “That is incorrect. The Americans did not build the first Podcatcher.” and a similar Clip for option B. Both of them would ask the question again, since they have an ‘Auto continue’ connection back to the question Clip. Option C would yield “That’s correct! The first Podcatcher was built in the Netherlands in the early 2000s.”. The flow then ends, as there are no more connections to follow.
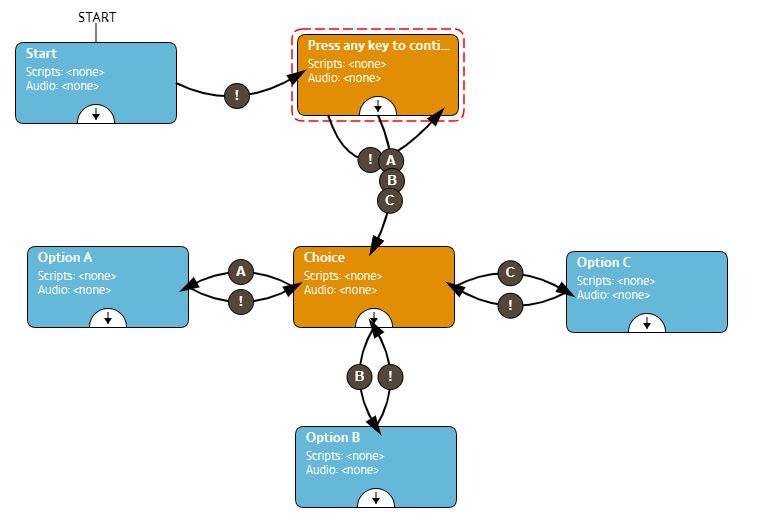
Advanced Clip flows
You can combine all these features into more advanced flows if you’d like. The example below is similar to the A/B/C Clip flow from above, except it also has a looping “Press any key to continue” Clip after the introduction, as well as every option looping back to the question Clip (to make a “would you like to know more” style flow). Really, the sky’s (and the various mutually exclusive Connections) the limit in terms of how complicated you can make the flow. Feel free to experiment, and remember that you can drag Clips around to keep everything organised.