Met de migratie naar ons Podcatcher Platform hebben we de mobiele website veranderd in een PWA (Progressive Web App).
PWA biedt verschillende handige functies die zijn ontworpen om de toegang voor zowel jou als je bezoekers te stroomlijnen.
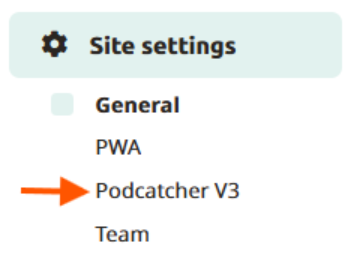
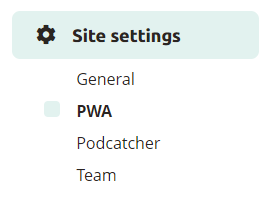
Toegang PWA
De pagina vinden
Om toegang te krijgen tot de PWA-instellingen en de bijbehorende toegankelijkheidsopties, navigeer je naar Site-instellingen en selecteer je PWA (Mobiele Website).
QR-code
In plaats van de code handmatig in te typen, kunnen bezoekers gemakkelijk een QR-code scannen. Dit kan door de code weer te geven op printouts bij het startpunt van de tour of op je balie. Klik gewoon op de downloadknop om een schaalbare QR code versie te verkrijgen. Wanneer een smartphone de QR code scant met behulp van een speciale app of de camera van het apparaat, worden bezoekers automatisch doorgestuurd naar je Mobiele Website pagina.
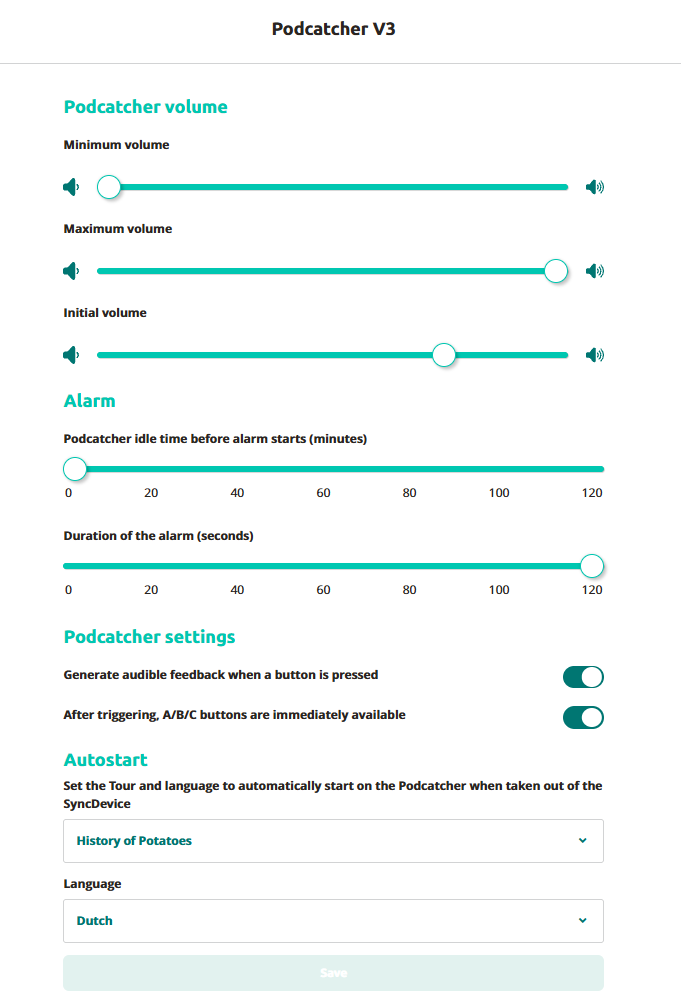
Ontwerp
Om de herkenbaarheid van je site te verbeteren, is het uploaden van een omslagafbeelding voor je PWA sterk aan te raden. Klik op de knop "Afbeelding uploaden" om te beginnen, selecteer een afbeelding om te uploaden en snijd deze bij tot de opgegeven beeldverhouding. Nadat je op "Opslaan" hebt geklikt, kun je de toegepaste wijzigingen direct bekijken.
Door gebruik te maken van deze PWA-functies kun je de toegankelijkheid voor bezoekers verbeteren, de toegang via aangepaste URL's en QR-codes vereenvoudigen en de visuele aantrekkingskracht van je site vergroten met een gepersonaliseerde omslagafbeelding.
Hoe PWA inschakelen
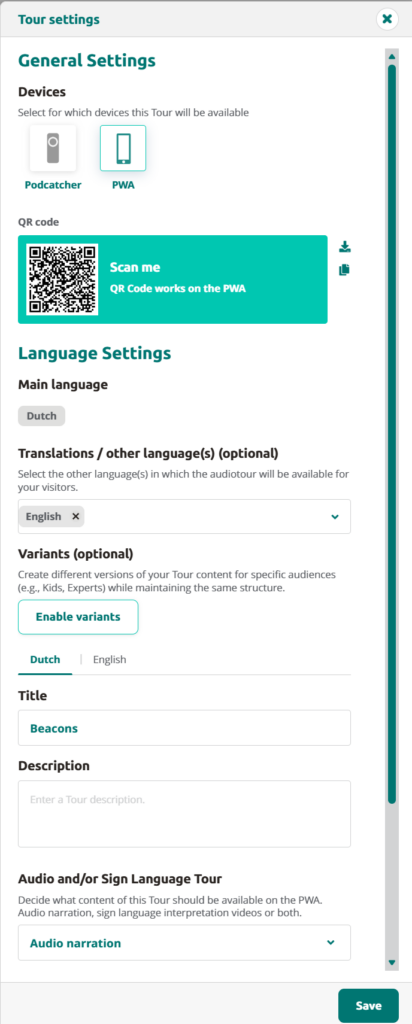
Om PWA in te schakelen ga je naar Tours, selecteer je de tour die je beschikbaar wilt maken voor PWA en ga je naar de tourinstellingen.
Om PWA te activeren, klik je op PWA. Als het is gemarkeerd met een groene rand, is het geactiveerd. Als de groene rand niet wordt weergegeven, is PWA niet actief. Klik vervolgens rechtsonder op Opslaan.
Om de QR code te gebruiken, kopieer of download je de QR code uit de tour instellingen. Je kunt de QR code ook vinden via Site-instellingen > PWA.
Wanneer de bezoeker de QR-code scant met zijn mobiele telefoon, krijgt hij het volgende te zien:
De bezoeker wordt geïnformeerd over de omgeving tijdens het gebruik van PWA en krijgt het advies om een koptelefoon of oortelefoon te gebruiken.
Als PWA is geactiveerd voor meerdere tours, kan de bezoeker kiezen naar welke tour hij wil luisteren.
Afhankelijk van de taal die beschikbaar is voor de tour, kan de bezoeker de gewenste taal selecteren.
Om naar de gewenste halte te luisteren, selecteert de bezoeker de halte.
Daarna kunnen ze naar de stop luisteren.
-1.png?width=242&height=242&name=6%20(1)-1.png)
.png?width=390&height=389&name=1%20(1).png)
.png?width=390&height=390&name=2%20(1).png)
.png?width=390&height=389&name=3%20(1).png)
.png?width=390&height=389&name=4%20(1).png)
.png?width=390&height=389&name=5%20(1).png)